GEM-BOOKS FAQ
Processing Invoice Photos in GEM-BOOKS
The Invoice Photo System has been designed to simplify the entry of invoice data from your suppliers, avoiding the need to enter them as you go along. It allows you to quickly take a photo of your invoices, which will then have the status of “awaiting processing”. This way, the person responsible for bookkeeping will have access to the pending photos and can easily convert them into expense transactions.
Access the Invoice photos gadget
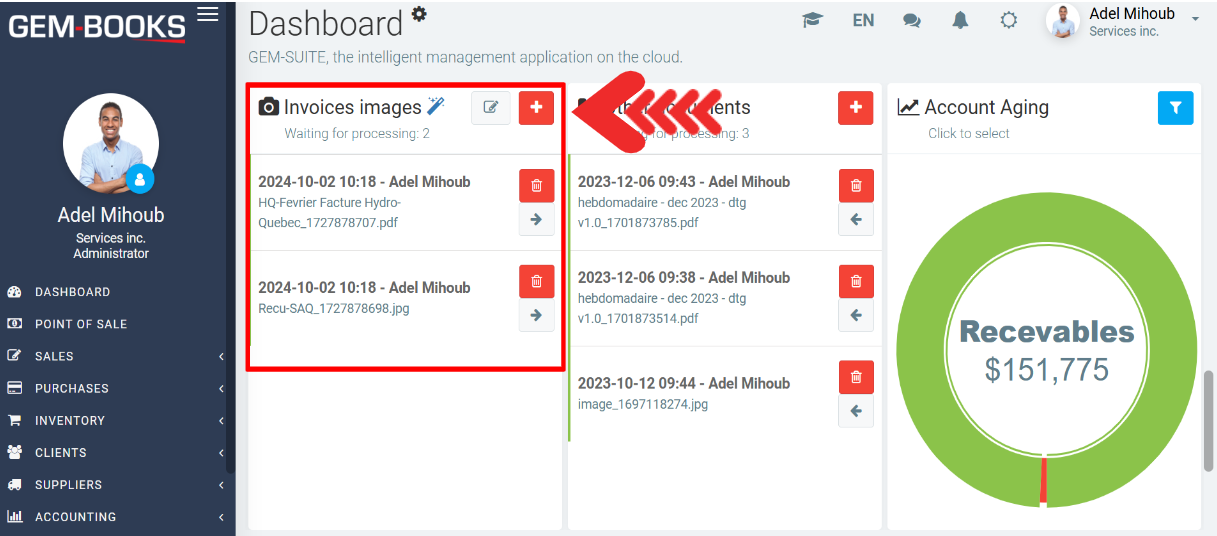
On the home page, locate the Invoice Photos gadget. You'll see the photos you've taken, but which haven't yet been processed by the accounting department. To add a new photo, click on the red + button at the top right of the Invoice Photos gadget.

Note: with the red + button, there's a difference between a computer and a mobile device like a tablet or phone. On a computer, you're more likely to want to upload pdf invoices that you've received by e-mail. Whereas on a phone, the camera opens and you can enter a receipt.
If you're using a computer, you'll need to import a file from one of your folders. Once you've selected the photo, it will appear in the list of photos waiting to be processed on your home page and in the Invoice Images menu.
If you're using a mobile device, when you click on the red +, you'll have the option of taking a photo with your device or selecting one from your gallery. Once you've selected or taken the photo, it will appear in the list of photos waiting to be processed on your home page and in the Invoice Photos menu.
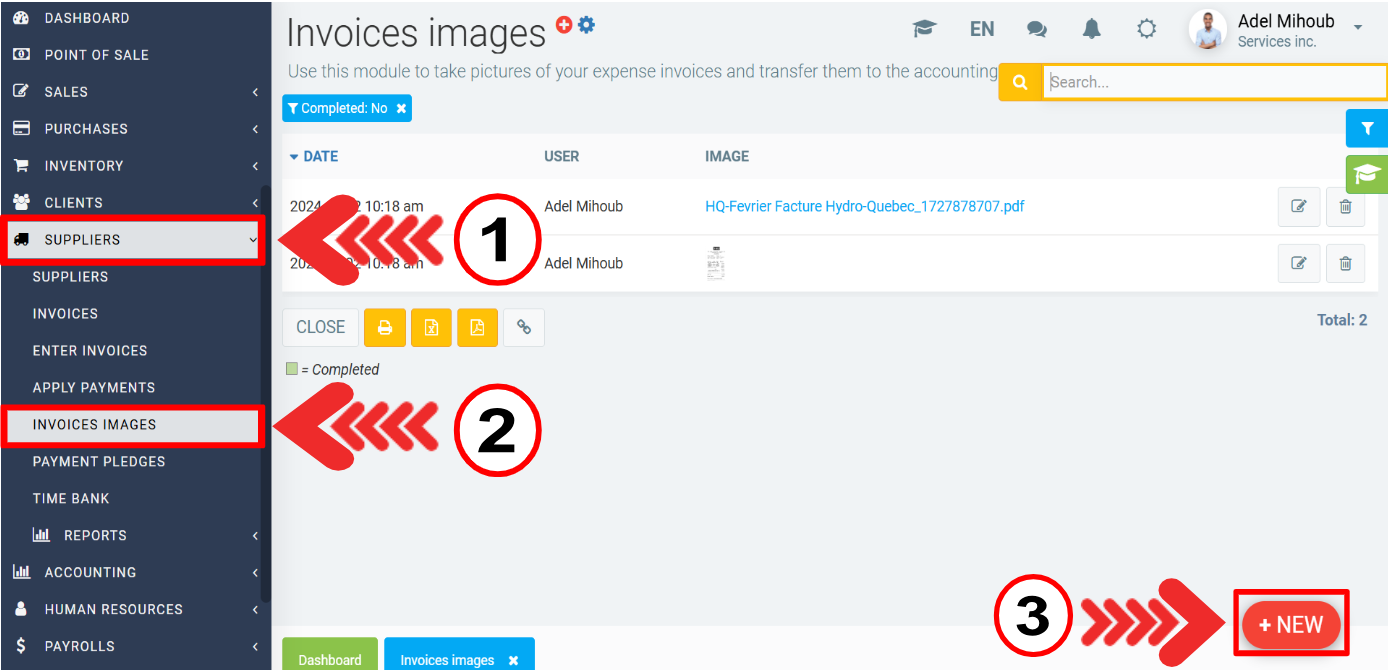
You can also access the Invoice Photos module by clicking on Suppliers > Invoice Images in the left menu. To add photos from this page, click on the red + New button.

Processing photos
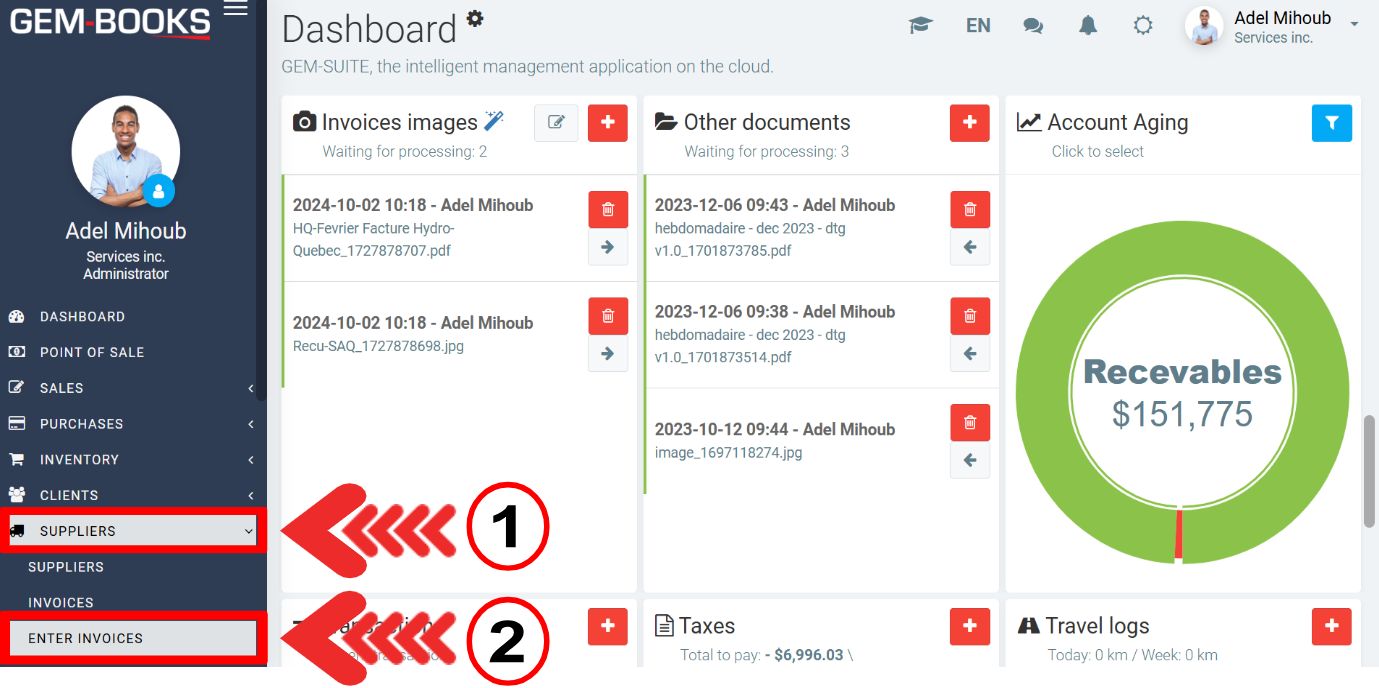
To transfer your invoice photos to accounting, click on the paper and pencil icon in the top right-hand corner of the Invoice Photos module box on the home page, or click on Suppliers > Enter invoices.

You can then select the photos to be processed, view their information or delete them.
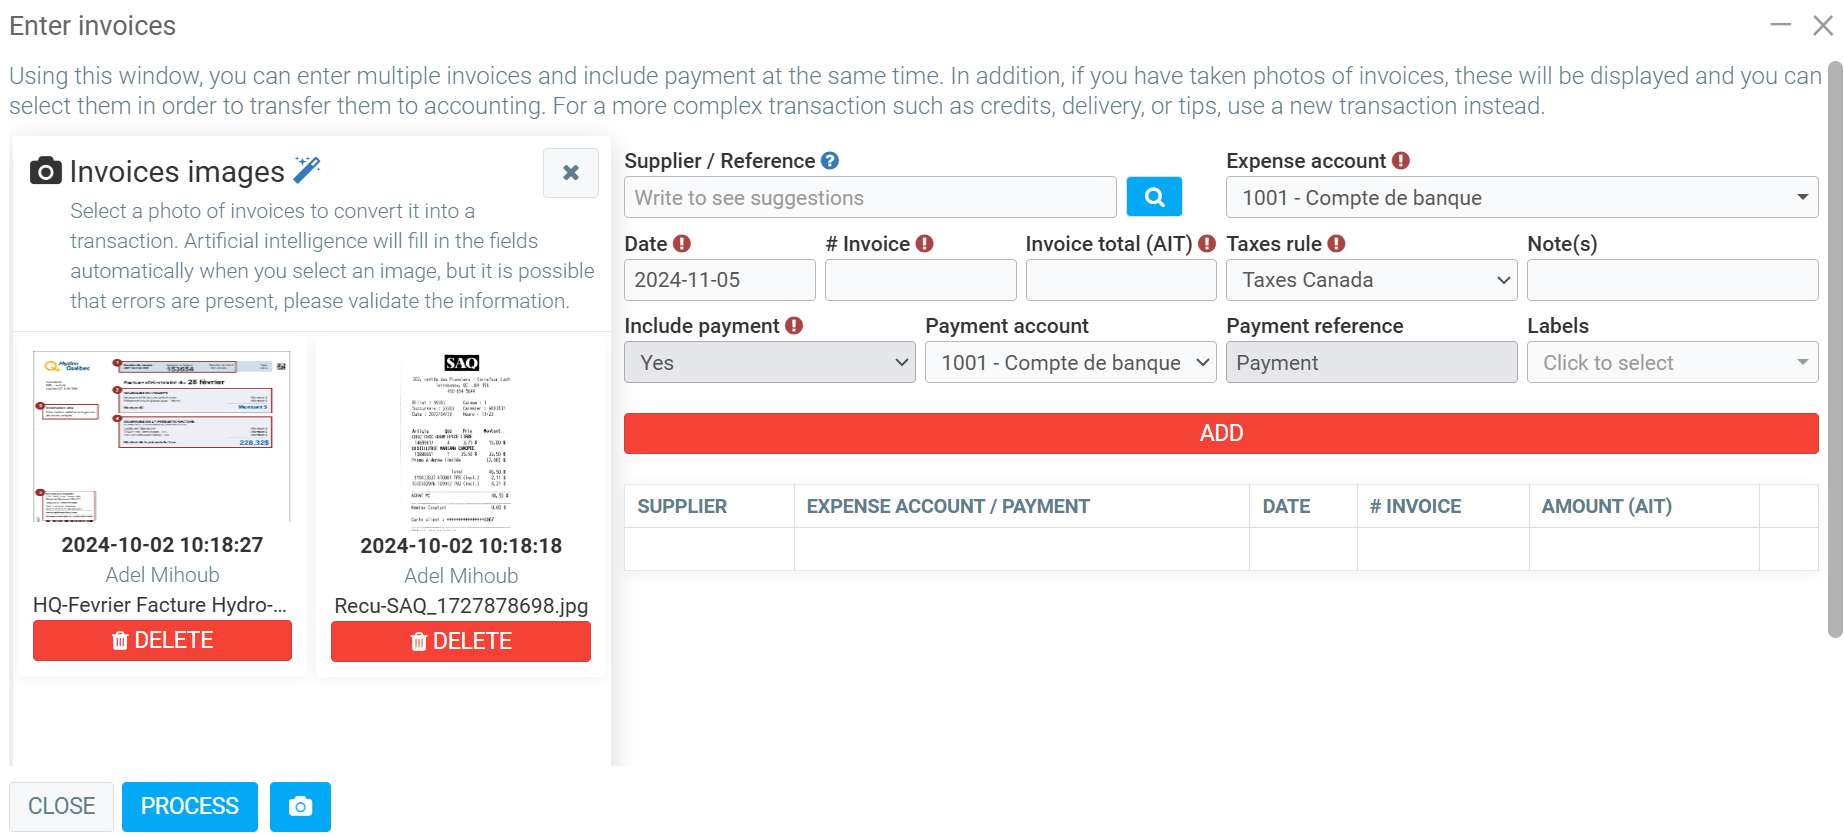
A window entitled “Insert invoices” appears on the screen. Your photos will appear on the left, under the heading “Invoice photos”.
If there are no photos waiting to be processed, the “Invoice photos” section will not be available.

The “Invoice photos” section contains photos that have not yet been processed. Here you'll find information such as the date the photo was taken and the name of the user who took the photo. You can delete a photo by clicking on the red “Delete” button beneath each photo.
To display a photo on screen, click on it. This will allow you to better read the information it contains.
Select photos to be processed, view their information or delete them
A window entitled Insert invoices will appear on the screen. Your photos will be on the left, under the heading Invoice photos (see image below). If there are no photos waiting to be processed, the Invoice photos section will not be available.
The Invoice Photos section contains photos that have not yet been processed. Here you'll find information such as the date the photo was taken and the name of the user who took the photo. You can delete a photo by clicking on the red Delete button below each photo.
To display a photo on screen, click on it. This will enable you to better read the information it contains.
Enter photos
Select the photos one by one, and fill in the fields on the right of the screen. Fill in the following fields based on the information contained in the selected invoice photo:
- Supplier/Reference (optional): Enter the supplier as reference.
- Expense account: Enter the appropriate expense account.
- Date: Enter the invoice date
- Invoice #: Enter the invoice number
- Amount (incl. VAT): Enter the amount of the invoice (all taxes included)
- Tax rule: Select tax rule
- Include payment (optional): Specify yes or no
- Payment account (optional): Select payment account
- Payment reference (optional): Enter a reference for the payment.
- Labels (optional)
When you've finished, click on the red Add button to your right. A line containing the information you have entered will appear, and the photo will be removed from the list of photos awaiting processing (see photo below).
You can enter as many photos as you like. However, please note that until you click the Process button, your transactions will not be saved.
Send completed photos (transactions) to the accounting department
When you have finished entering the data for the photos you wish to transfer to accounting, click on the blue Process button at the bottom left of the screen (see photo above). This action will create a transaction for each invoice, based on the data you've entered. The original invoice photo will be attached to the transaction for easy and efficient viewing.
Photos of processed invoices will be marked as completed, and will therefore no longer be visible in the Invoice Photos module (unless you filter the list to see completed photos).
To prevent or allow access to this module, here are the associated roles and permissions.

Posted
11 months
ago
by
Bianca da Silveira De Amorim
#2146
354 views
Edited
11 months
ago
