Creating a Product or a Service
To create a new product or service, from the Main Menu on the left side of the application, click on Inventory > Products & Services > +New.
- INFO Tab
Product Code
Assign a Code to your product. Refer to Using the Code and Type Fields: Choice and Automatic Generation for more details on how to choose or generate a code.
Product Name
Choose a Name for your Product or Service. This name should be intuitive for your employees so that they can find it quickly when creating estimates.
Category
Choose the appropriate Category according to your needs. See Understanding the Categories Defined under Inventory and Products & Services Category Management/ Creating Categories for more details. The two most commonly used categories are 200-PARTS and 500-APPOINTMENT+JOB+HOUR which are predefined in your GEM-CAR.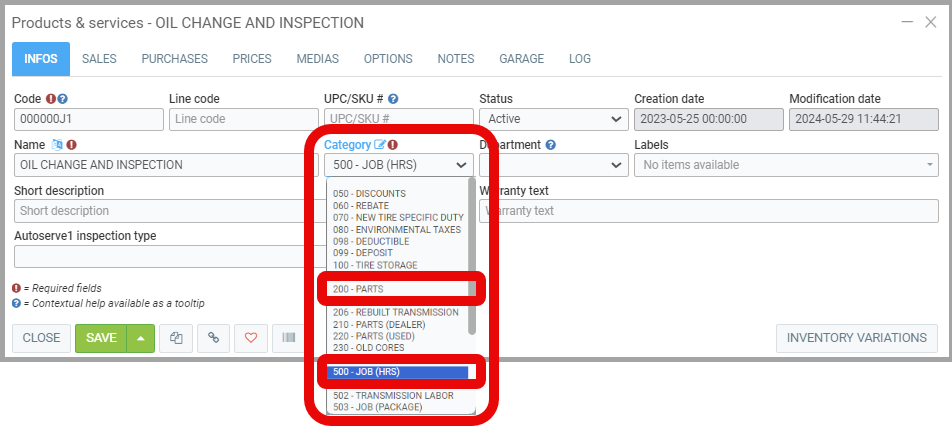
Warranty Text
Also add Warranty Text if applicable in the section provided for this purpose.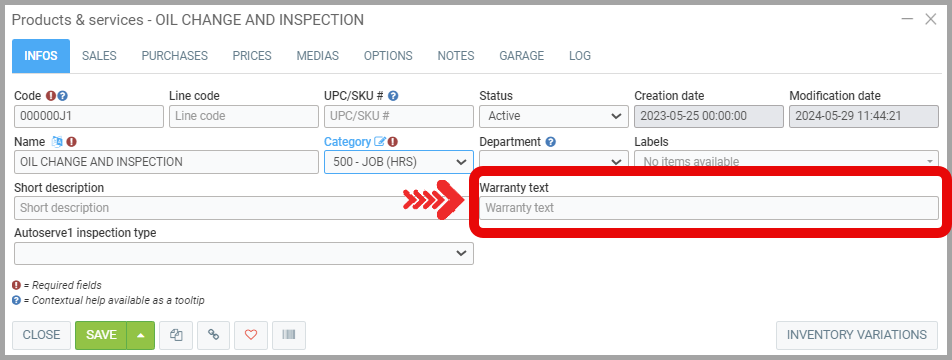
- SALES Tab
Under the Sales tab, the two items that will interest you the most are the Regular Sale Price and Add these products automatically when adding this product to a sale.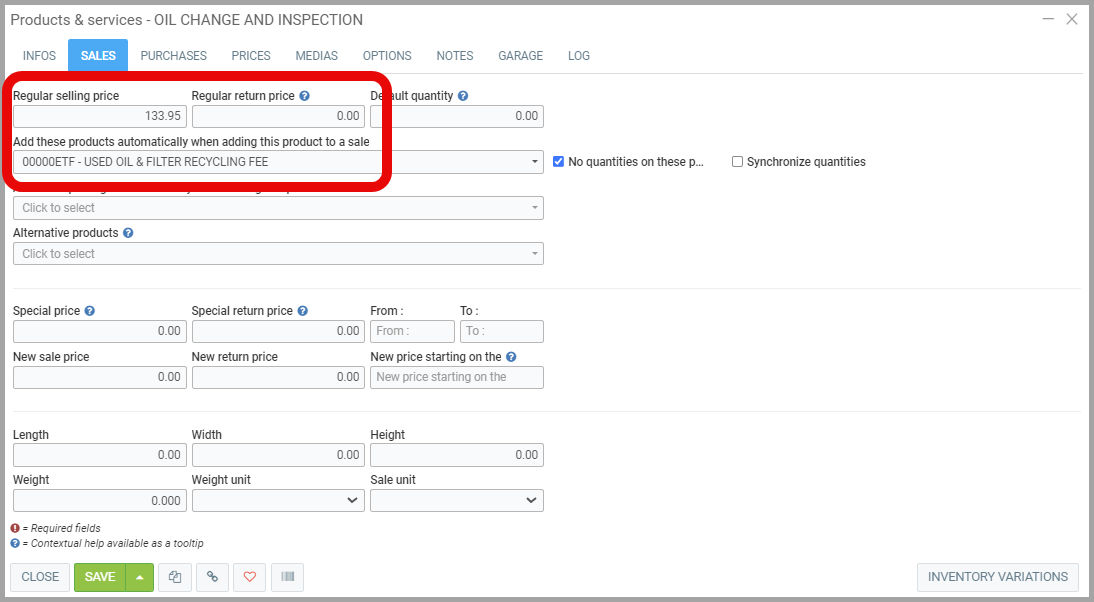
Sale Price
Note that the Regular Sale Price is the one that applies to most of your customers. However, price lists can be used to give discounts to certain groups of people. Add your product to these price lists under the Prices tab. See Creating a Group Discount with a Price List for more information.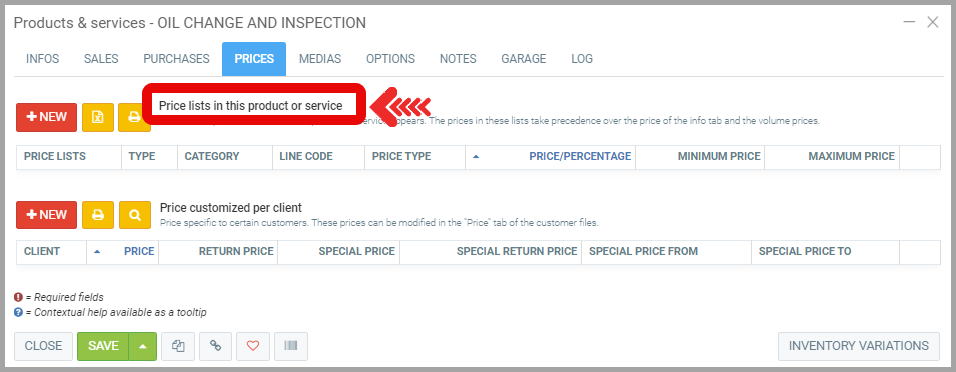
Automatic Product Addition
Adding products automatically when adding the product to a sale can help prevent you from forgetting certain charges. The recycling fee for an oil change or a battery replacement is an example of this.
Adding sets follows the same principle, but allows you to add more than one product. See Creating a Package from The Point of Sale (Estimate) and Managing Packages for Products & Services for more information on creating sets.
Adding alternative products can also be useful when you are concerned that your product may sometimes be out of stock. You can therefore choose to indicate an Alternative Product that could be selected when creating the estimate. See Configuring Alternative Products for more details. - NOTES Tab
Important! The notes entered here do not appear on the customer's estimate or invoice. They are seen when adding the item to the sale or on the work order, depending on the option you have selected. For legal notes that you want to see on the customer's estimate or invoice, enter them under the INFOS tab.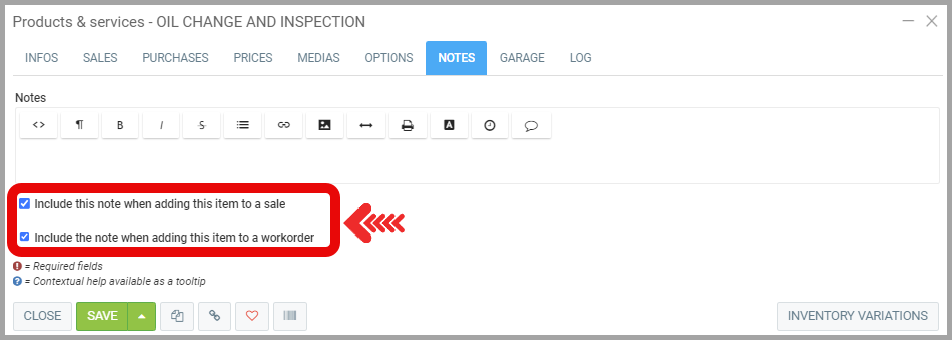
- GARAGE Tab
The GARAGE tab appears and applies onlny when you create a Service.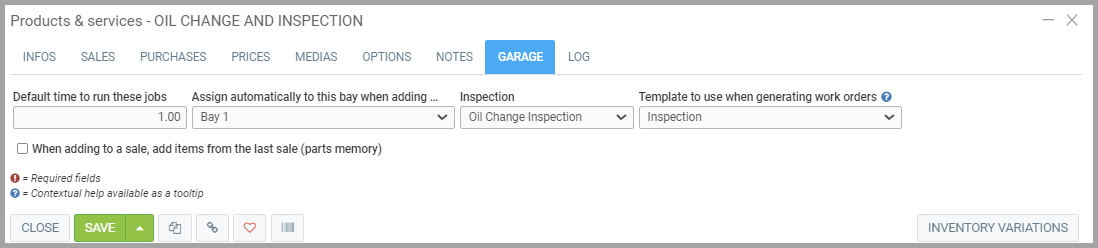
It is necessary to plan the time required to complete a job. Enter it in hundredths (Example: 0.25 for 15 minutes) under Time required to perform this work. See Planned Time / Real Time / Sold Time for more information on what planned time is.
It is especially recommended to Assign this bay by default when adding this job if the task can only be performed in a bay. See Configuring Necessary Bays to Schedule Appointments in The Calendar if the bay you want to assign does not appear in the choices.
Also, it is possible to automatically associate a work order form if your company uses several models.
Finally, select When adding to the sale, add the items from the last sale for services that the customer will frequently use the same items for. This can be useful for oil changes, for example, since the customer who keeps their vehicle will probably continue to buy the same oil and filter. See Parts Memory to Automate the Addition of Parts on the Estimate to better understand how this option works.
Learn More?
...
Posted 4 months agoby Nadine Toutant
#58140 viewsEdited 2 months ago