GEM-CAR FAQ
How to Configure Auto Integrate
Note: this function requires the GEM-LINKS module.
Configuring Auto Integrate involves several key steps to ensure seamless data synchronization across the platforms.
Follow the next steps to configure and use Auto Integrate with your GEM-CAR.
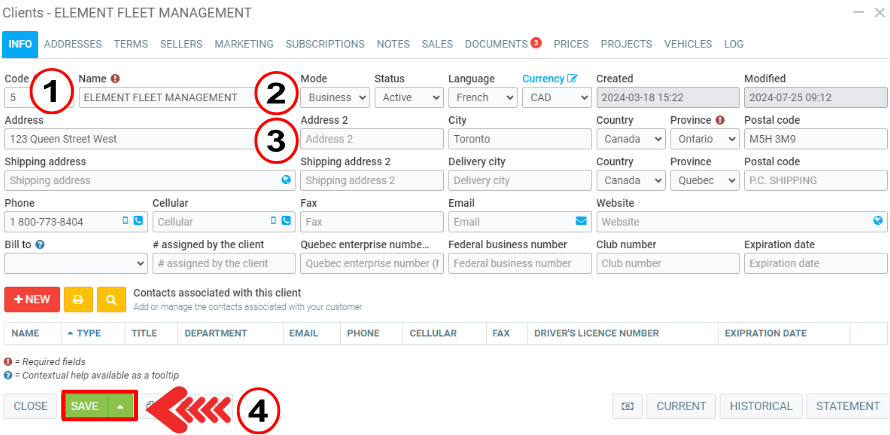
First, create the company as a client. Click on Clients > Clients > +New.
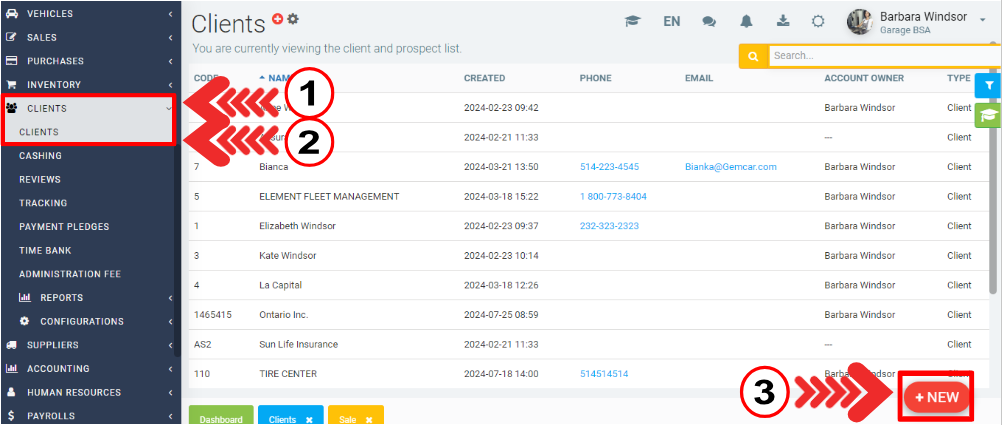
Insert the following information:
- Code
- Name (in our example, we chose Element fleet management)
- Address
- Mode: business
Click on Save.
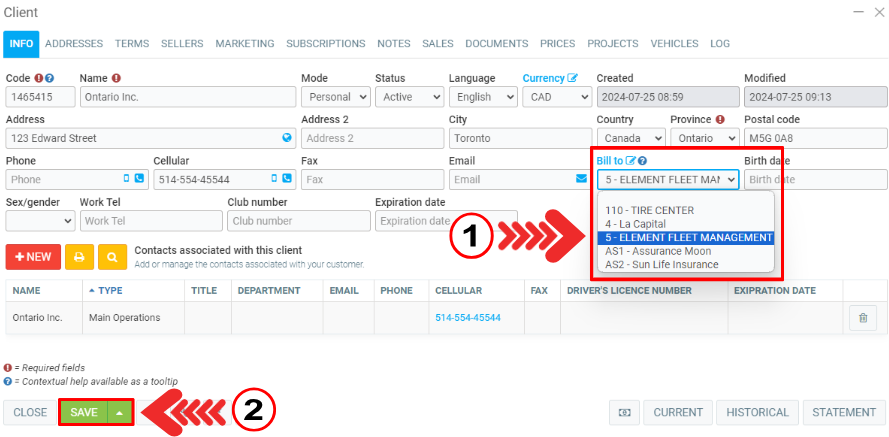
In the Point of Sale, click on edit the client, on the icon above the name of the client.
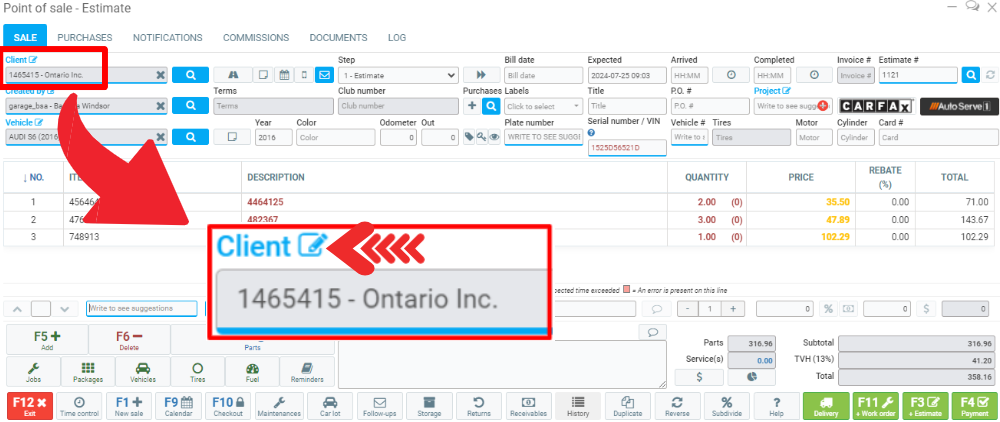
Search for the box Bill to and choose Element fleet management.
Click on Save.
Back to the Point of sale, after adding the products and services the client needs, click on the button Auto Integrate, on the bottom left, near the button Delete, or press F7.
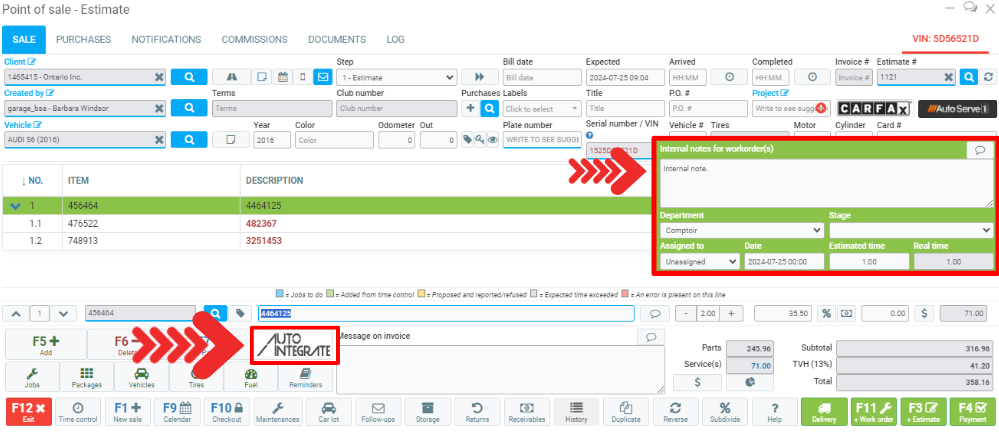
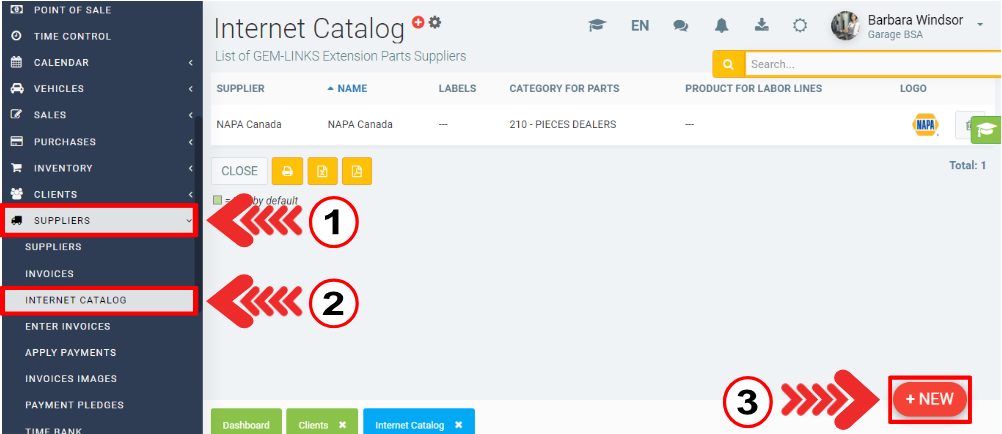
If the button is not showing, you must add it to your catalog.
To do this, click on Suppliers > Internet Catalog > +New.
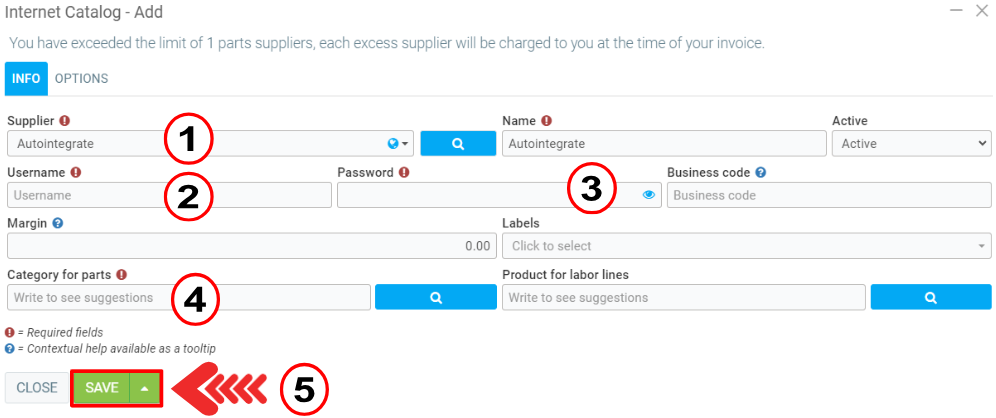
Insert the following information:
- Supplier
- Username
- Password
- Category for parts
Click on Save.
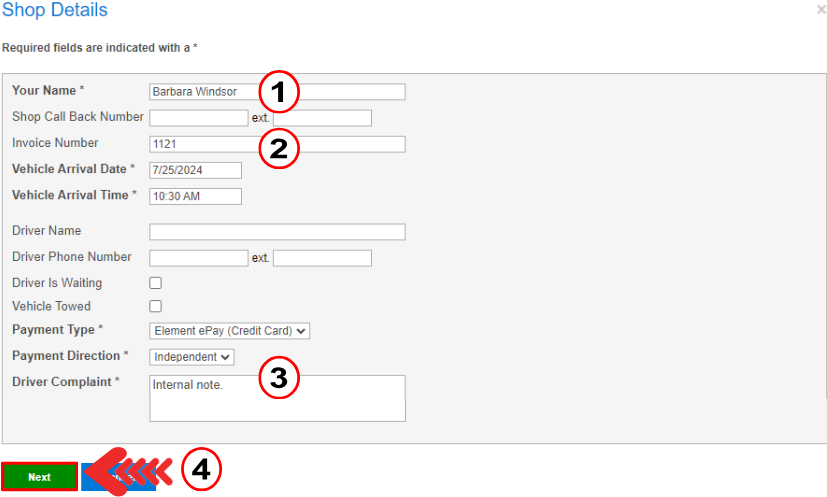
If everything is right, click on the button Auto Integrate (in the Point of sale), and it will show a window with some information. Check if the data is correct:
- The name of the person who created the sale
- The invoice number
- The note on the job (for example, internal note)
Click on Next.
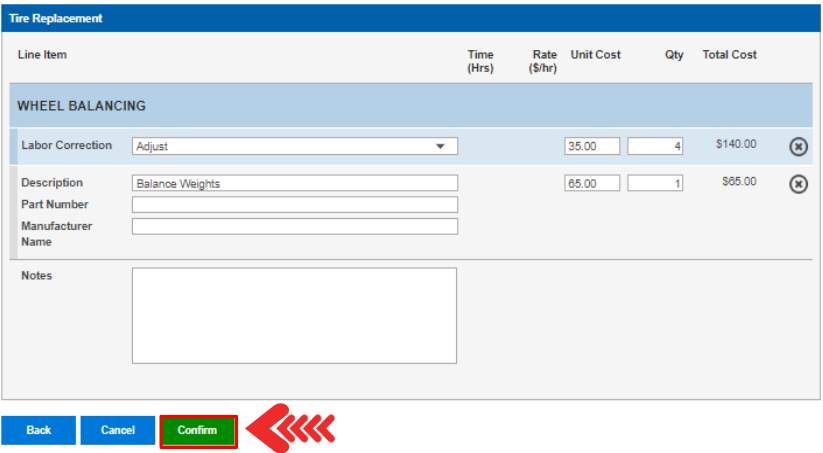
In the next window, select the products and services required by the customer.
Assign a unit value, quantity and then click on Confirm.
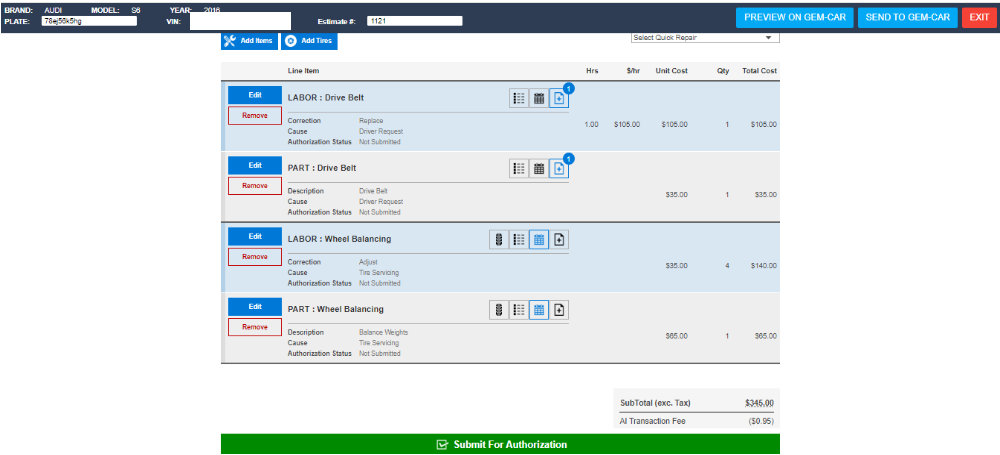
The products will be listed on the next page and it is possible to make changes using the Edit and Remove buttons on the left of each item.
Posted 2 months agoby Bianca da Silveira De Amorim
#188767 viewsEdited 2 months ago