GEM-CAR FAQ
GEM-PLEX Configurations
The GEM-PLEX module is a main module (EX: GEM-CAR, GEM-TMS, GEM-BOOKS) for building owners who wish to rent out units.
No need to activate GEM-CAR, GEM-PLEX is a complete system in itself.
Most of the functions unique to this module can be found in the Properties menu on the left.
Configurations
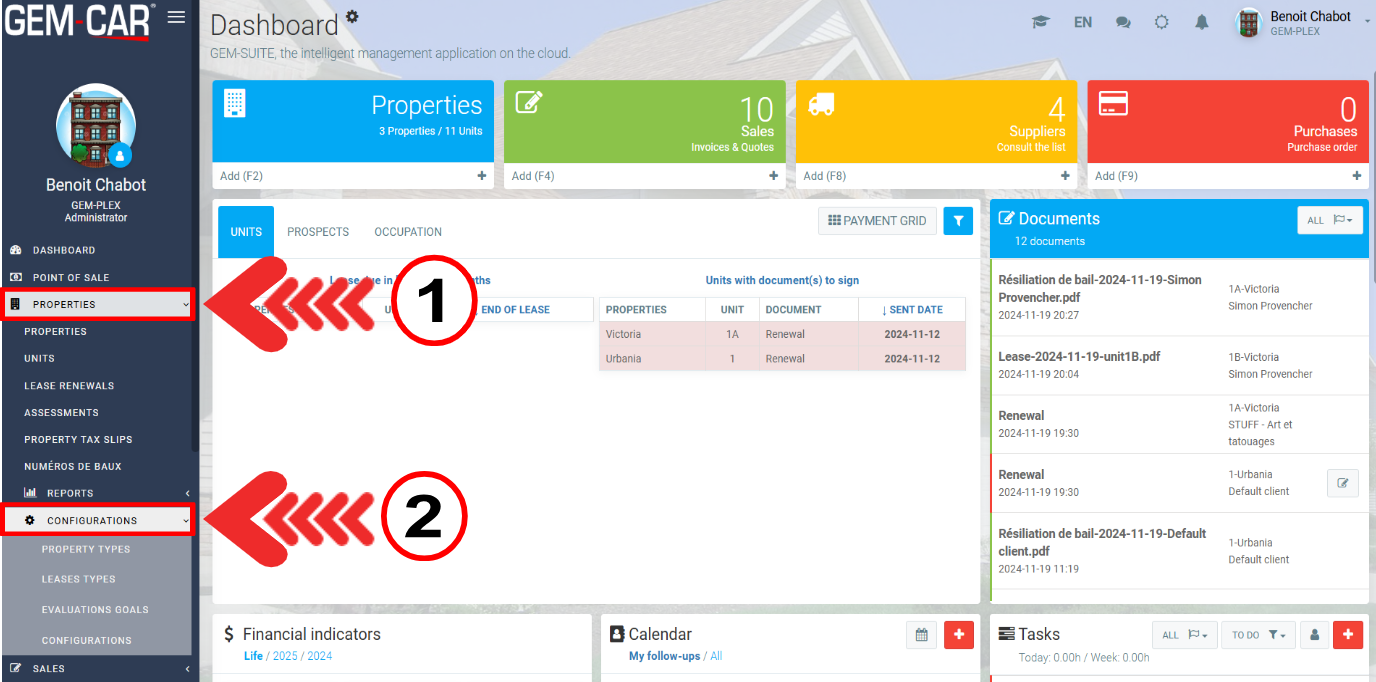
In Properties > Configurations, you can set the following options:
- Property types: You can specify property types independently. Examples of types would be 'duplex', 'quadruplex', etc. This acts like a label applied to the property.
- Lease types: You can specify lease types for your properties.
- Evaluations goals: For property appraisals, you can define the objective possibilities.
- Configurations: General configurations, such as appendix text on leases, products to be used when renting, etc.
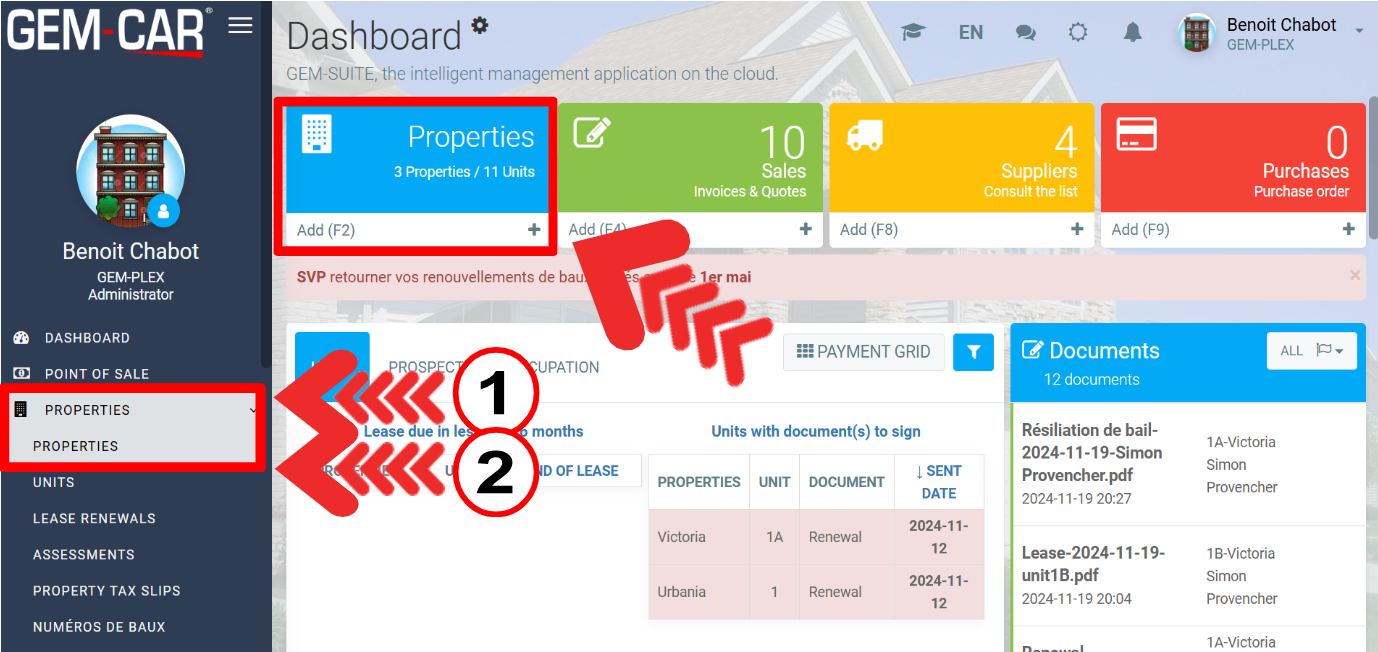
Properties
Properties are central to the GEM-PLEX module. The main menu (also accessible from the Dashboard widget) shows the system properties, which can be filtered with several parameters. You can also quickly see whether units are available (blue) and the number of units to the right.
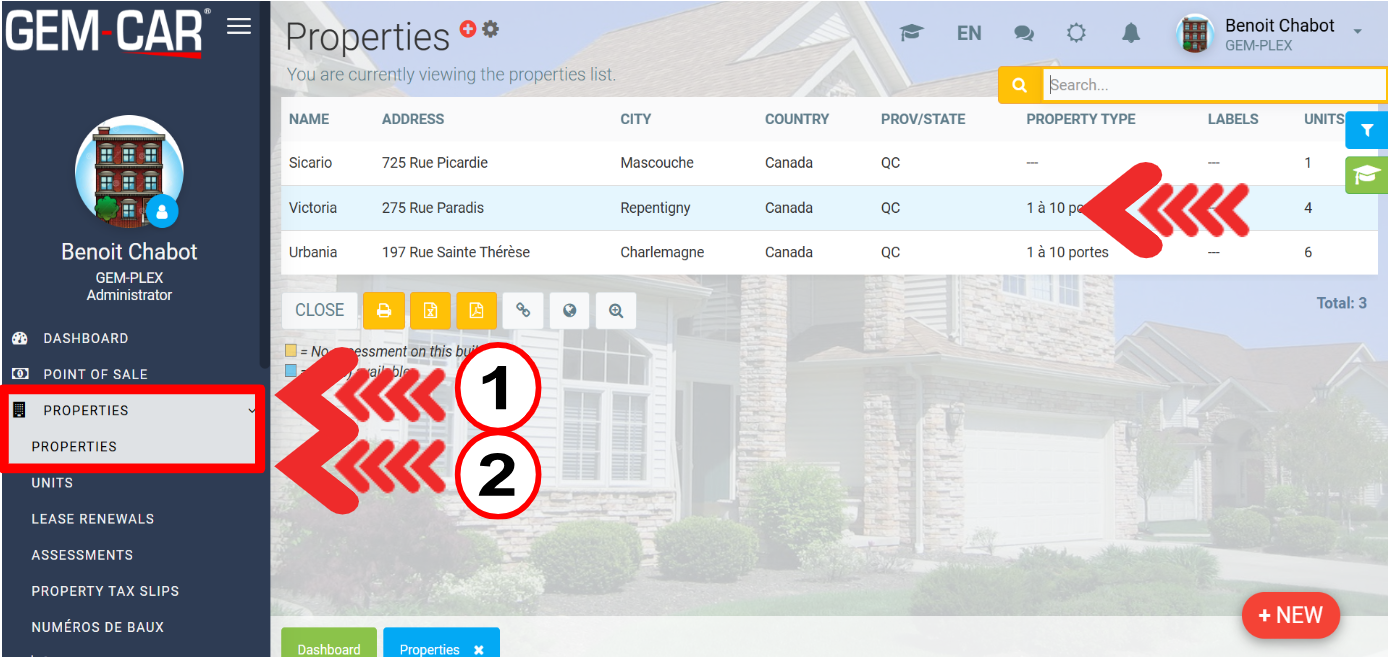
When we click on a property, we'll have access to several tabs concerning it, starting with general information (addresses, name, etc.) and the units it contains.
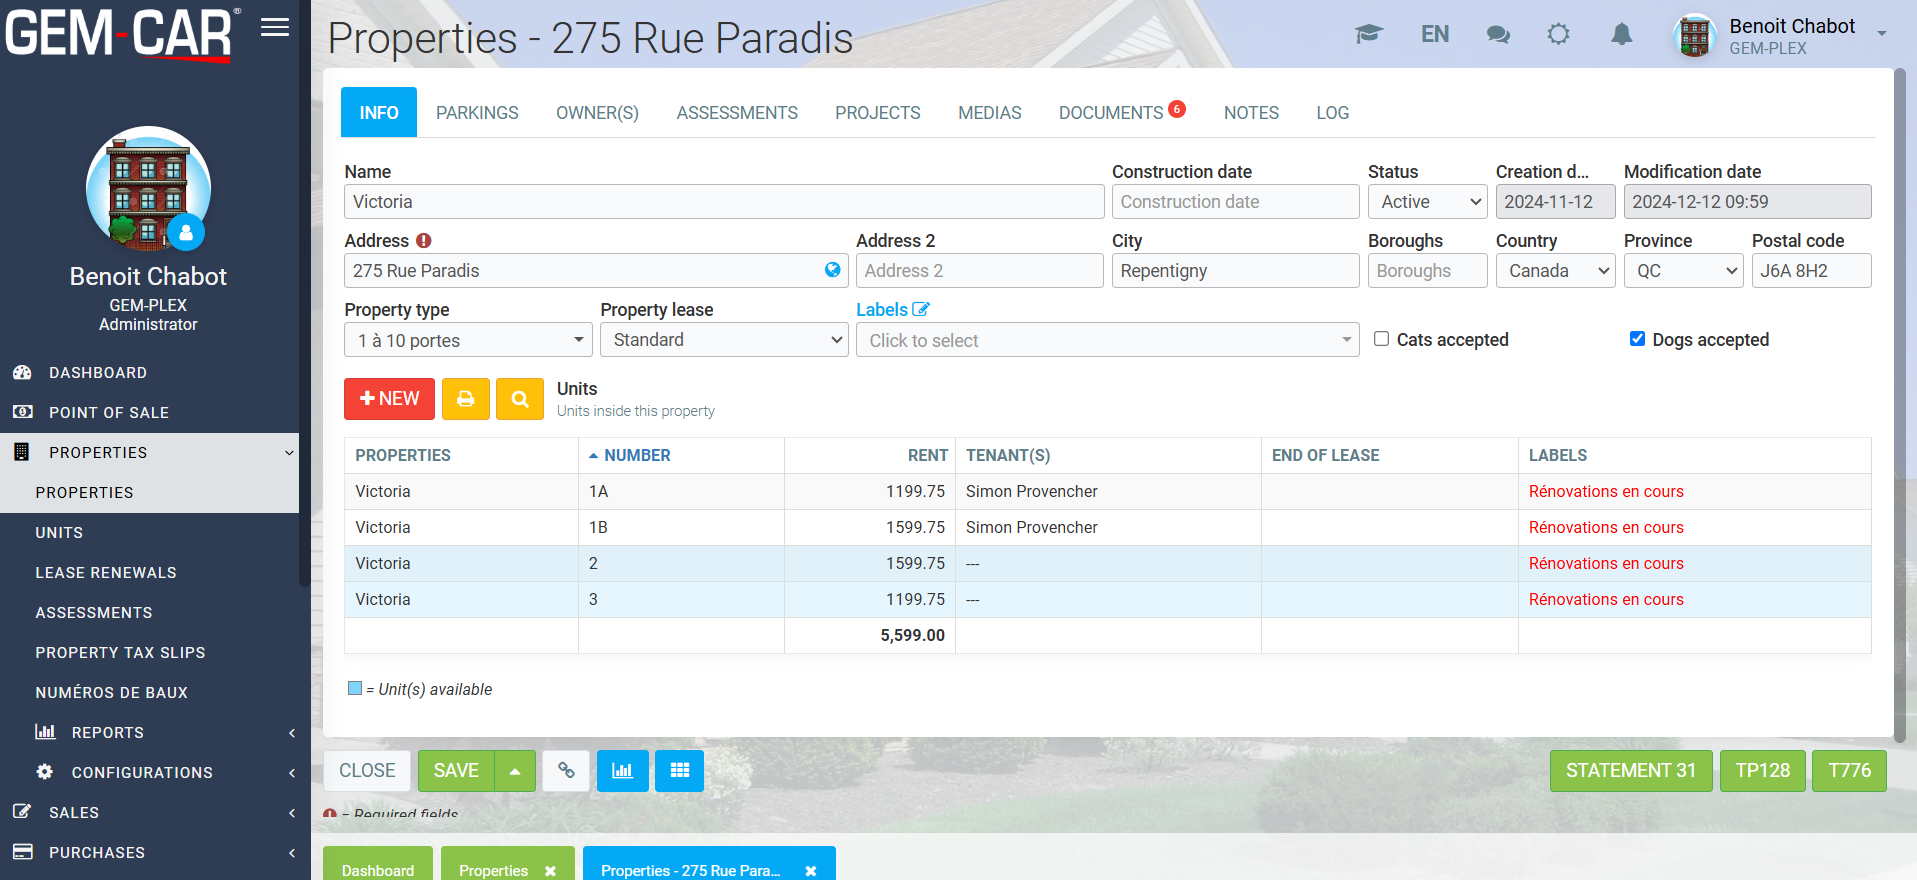
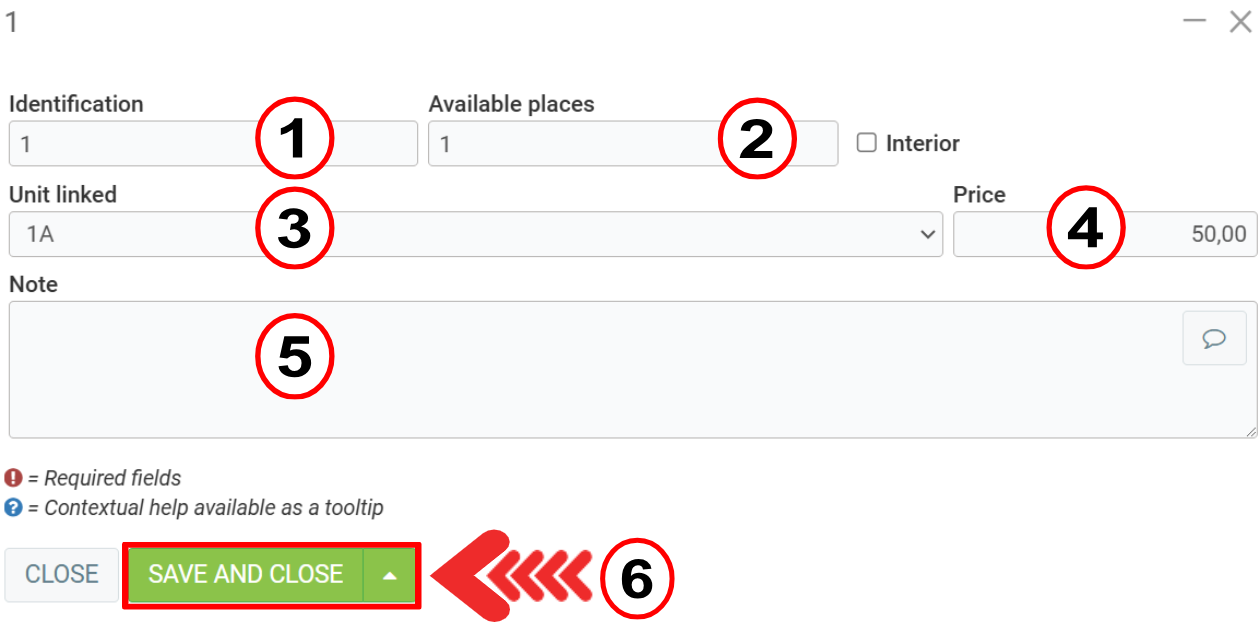
In the Parkings tab, you can manage the property's parking lots.
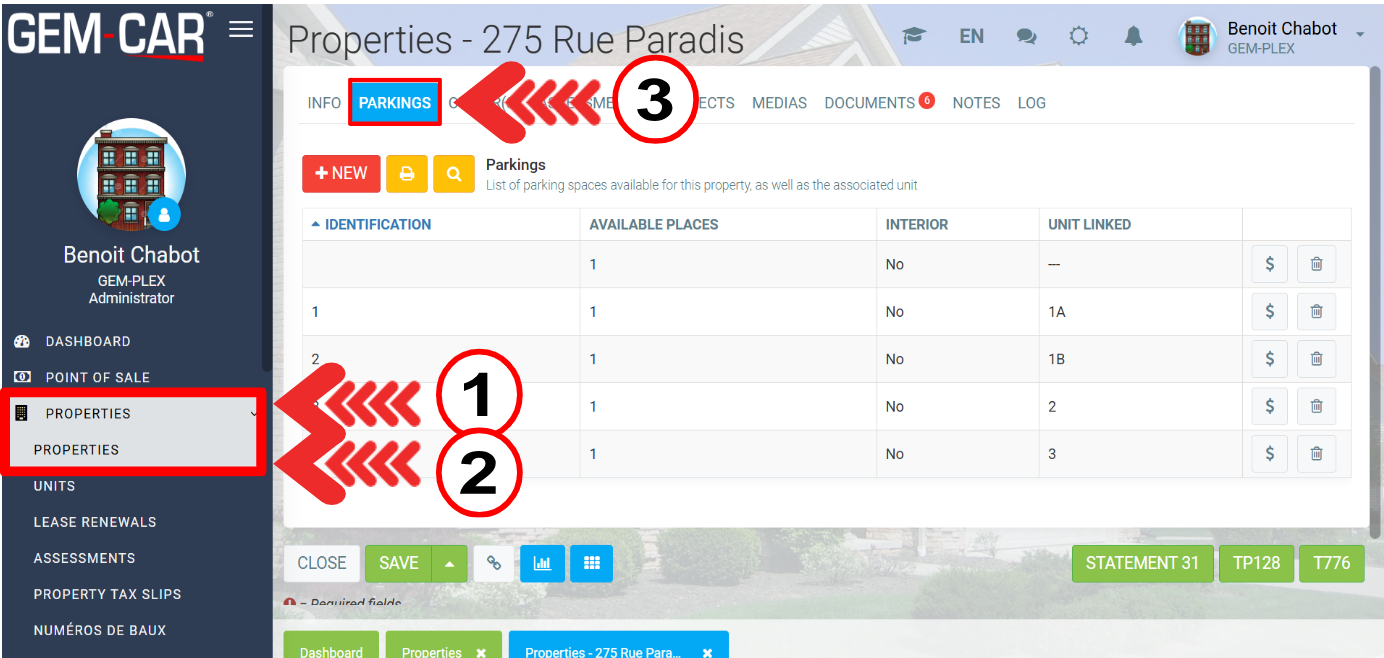
When you open one of them, the following information is displayed:
- Identification
- Available places
- Unit linked (link a unit to a client of the system, i.e. a person who is not a tenant of a unit)
- Price
- Note
Then click on Save and close.
In these cases, an icon appears in the parking list to generate a parking contract.
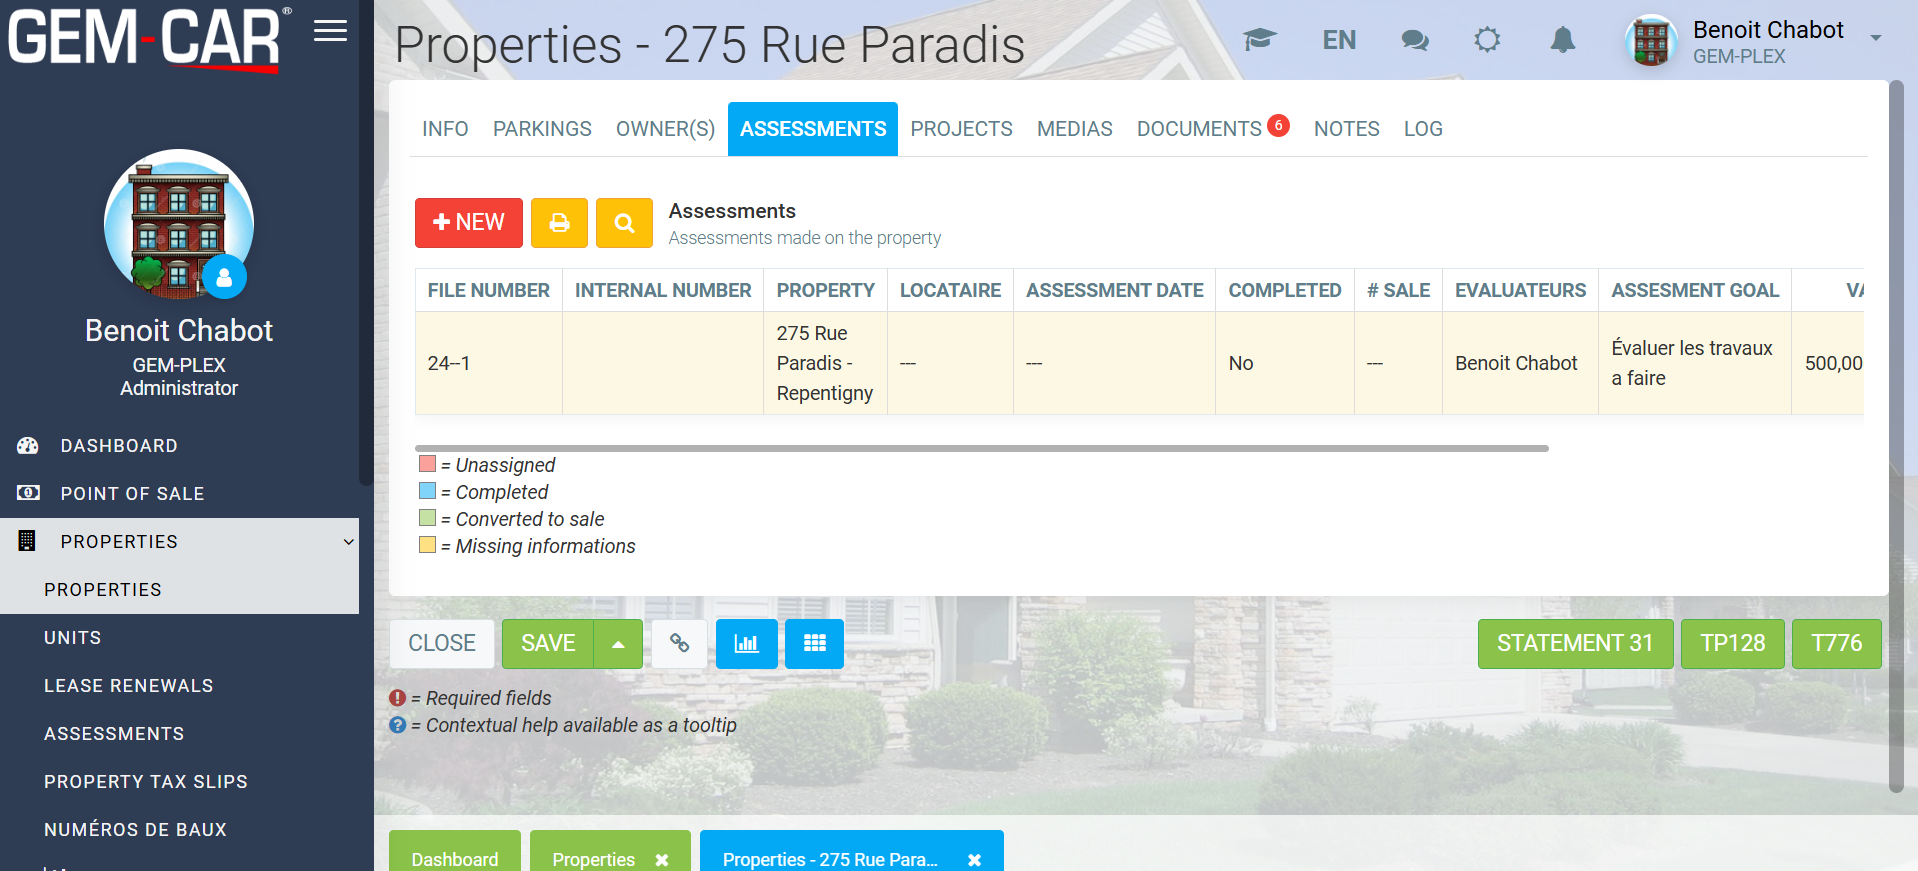
The Assessments tab lets you add assessments to the property.
The Owners tab lets you manage the building's owners.

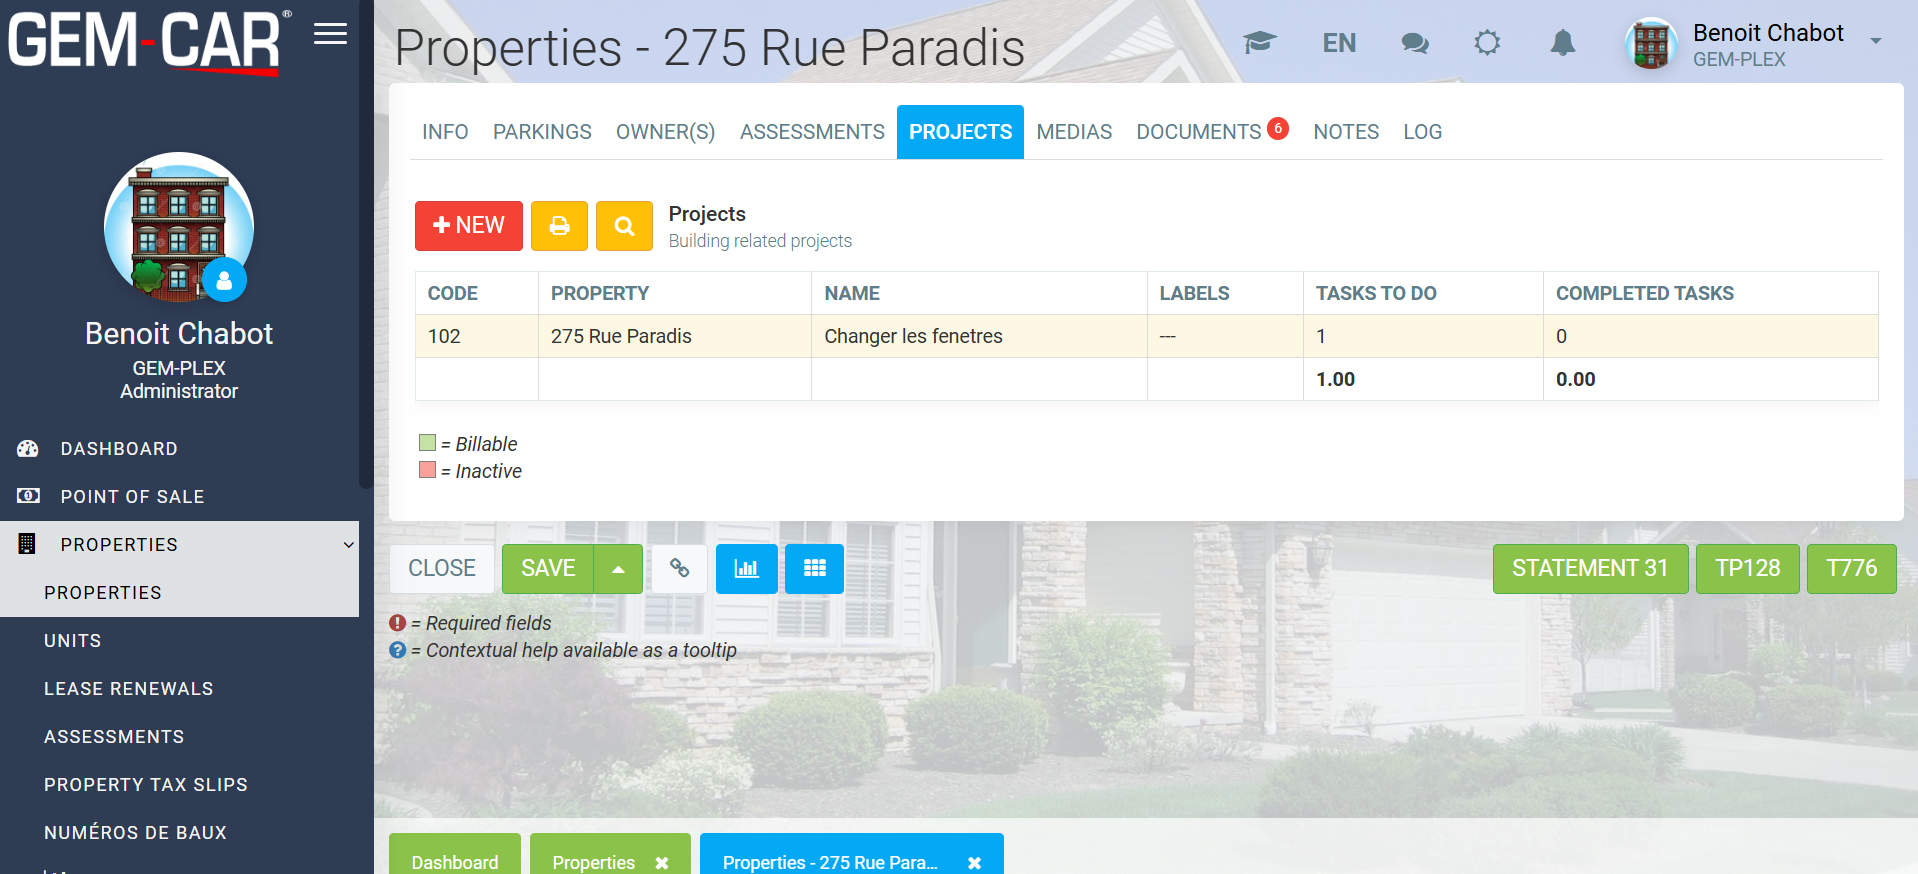
The Projects tab lets you manage projects/works/budgets linked to the building.
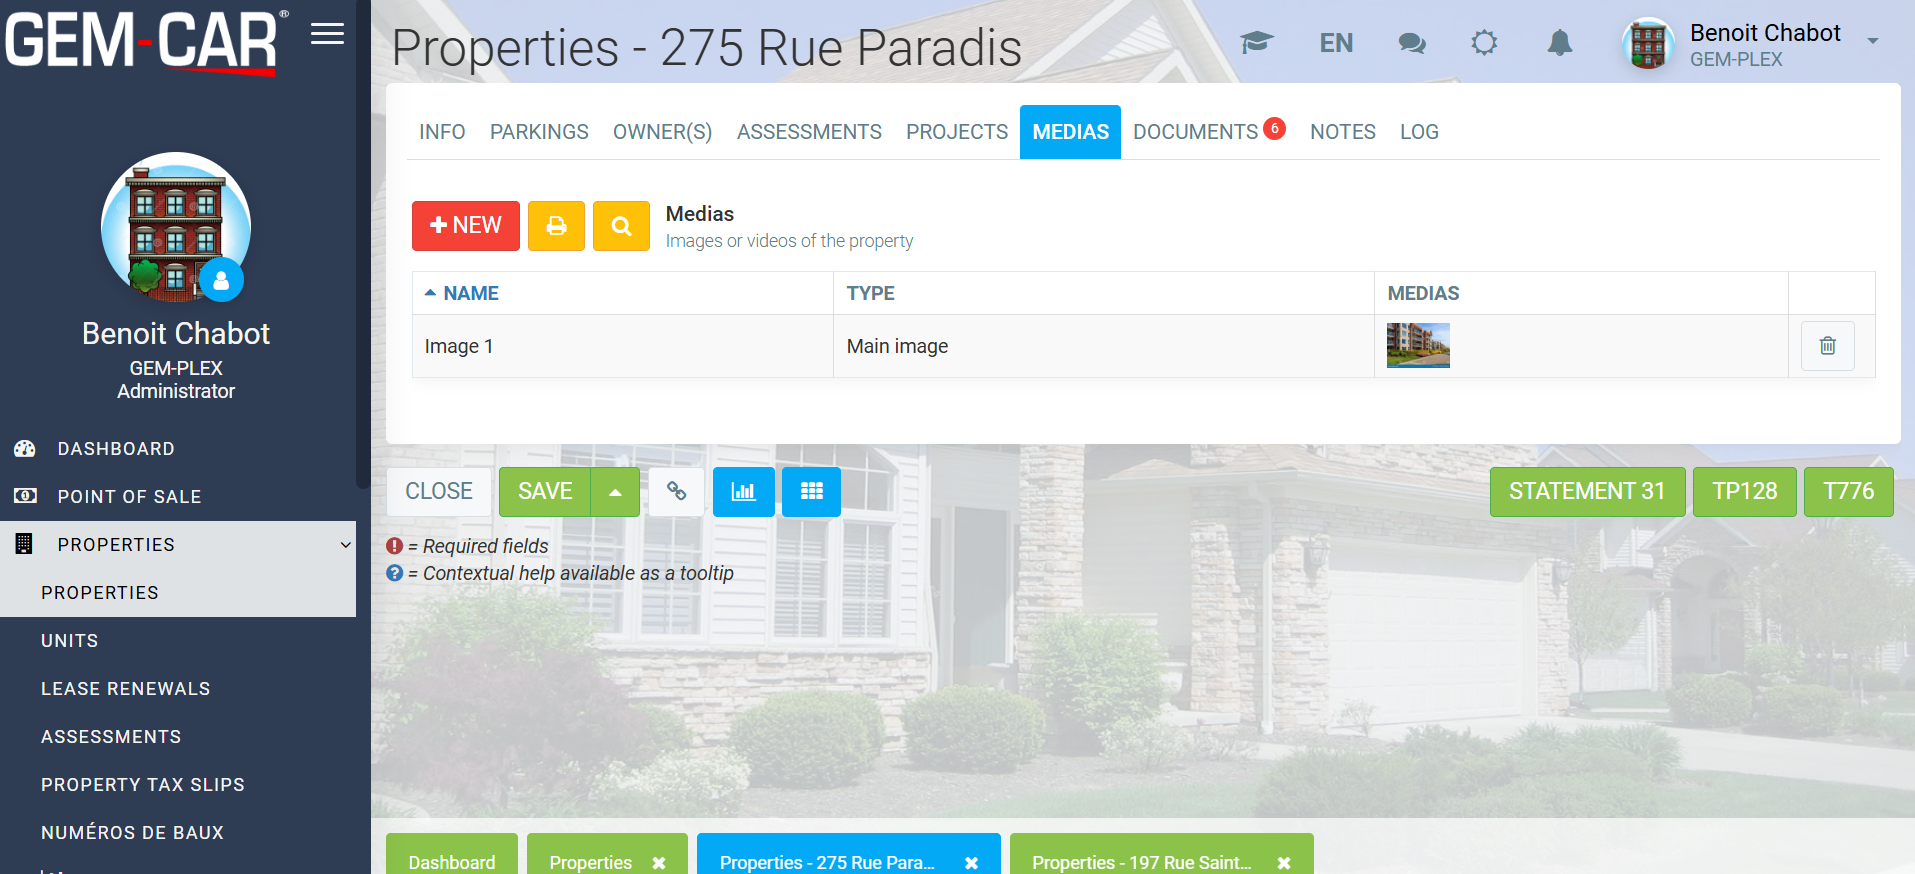
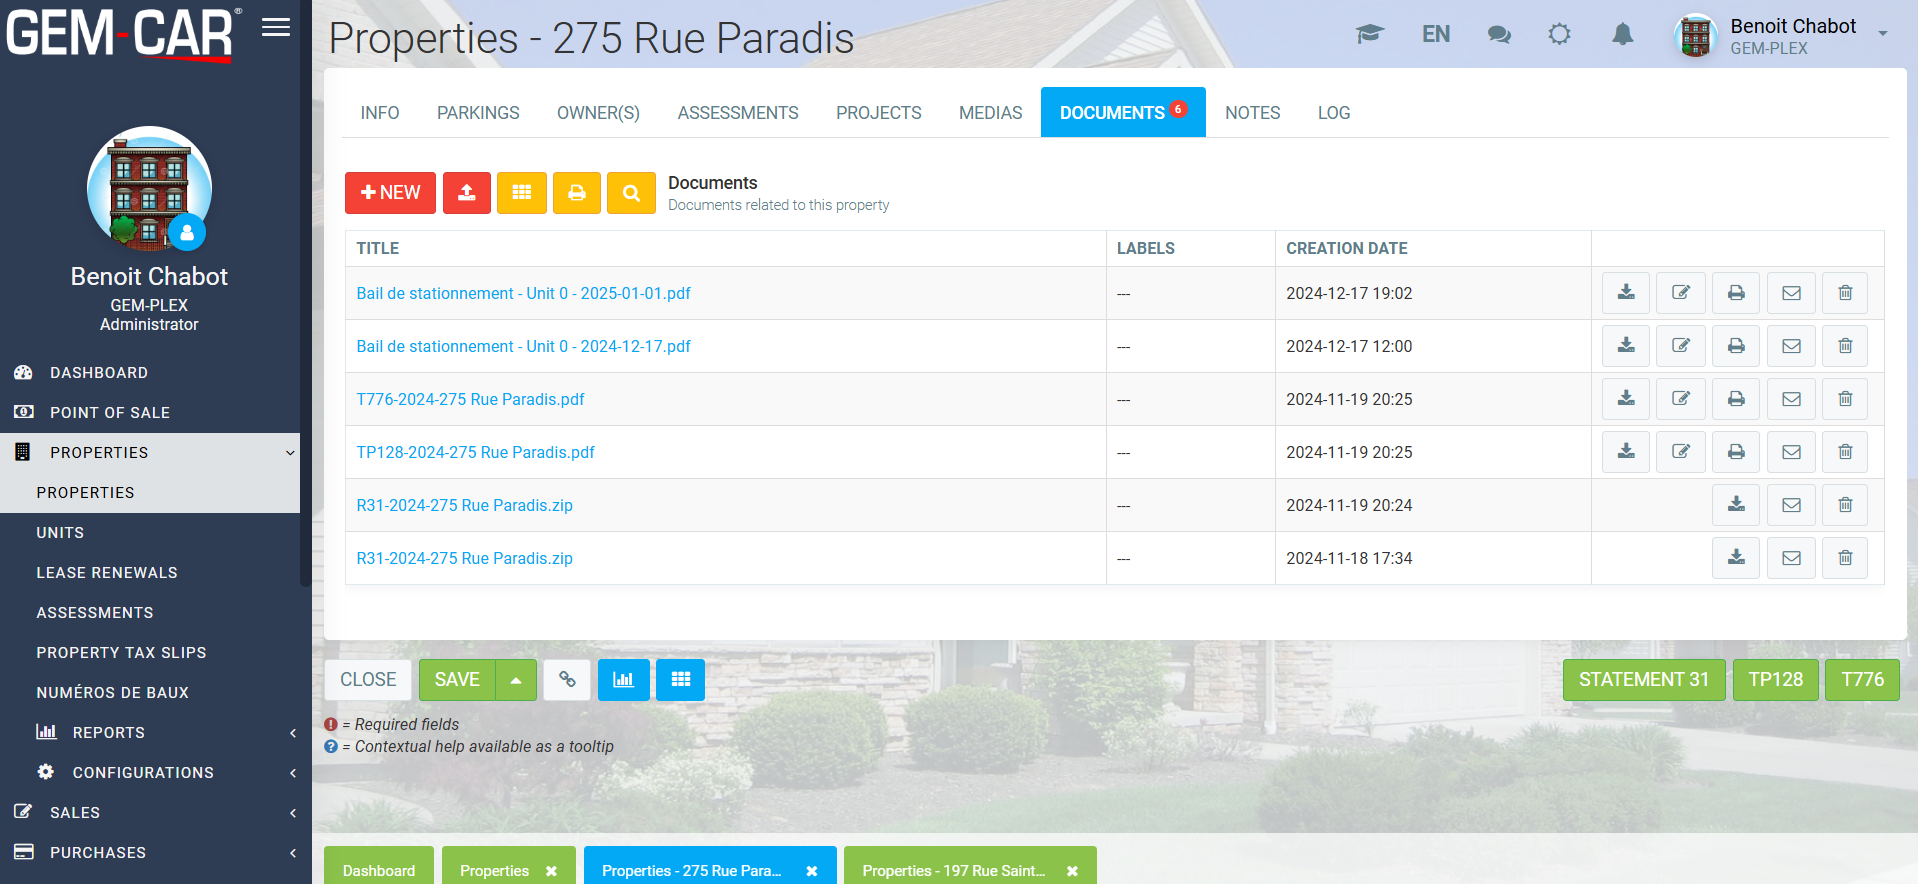
The Media and Documents tab for images and documents.
Units
The Units menu displays the package of units available for all properties, which can be filtered using a number of parameters.
When you open a unit, the display is the same as if you had clicked on it from the property.
You can also access the property quickly by clicking on its name in the unit file.
In the Info tab, you'll find the following information:
- Properties
- Number
- Rent
- Tenant(s)
- Number of bedrooms
- Surface (square feet)
- End of lease
- Labels
- Description
Then click on Save and close.
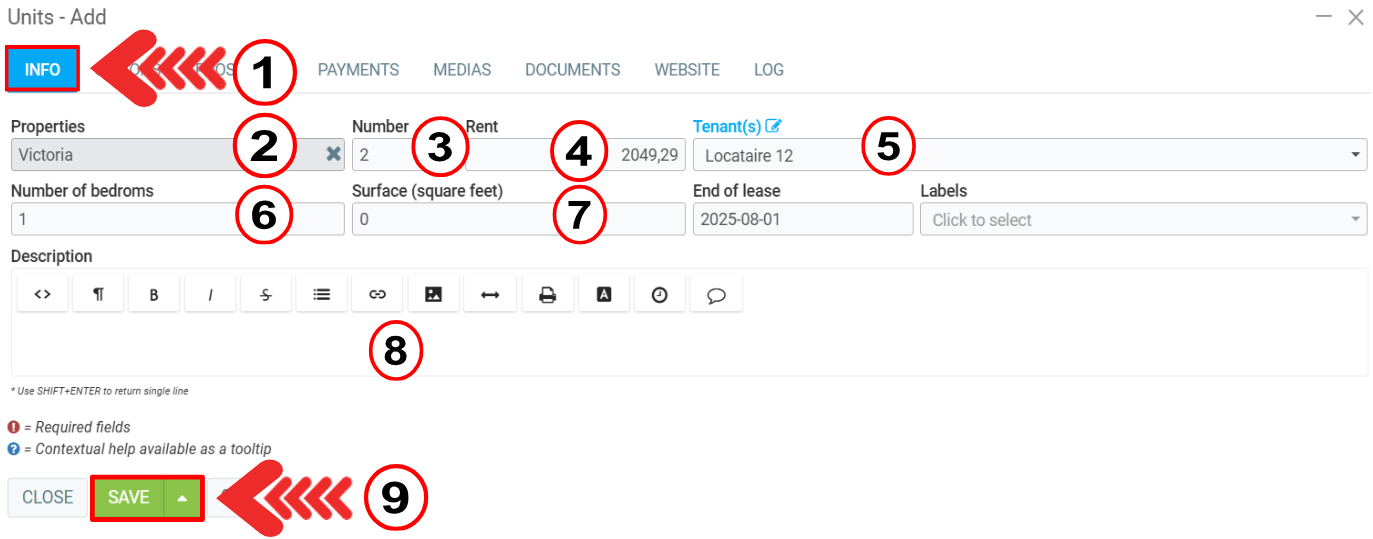
The first two tabs are used to define the unit's parameters.
The Prospects tab is used to define possible future tenants for the unit.
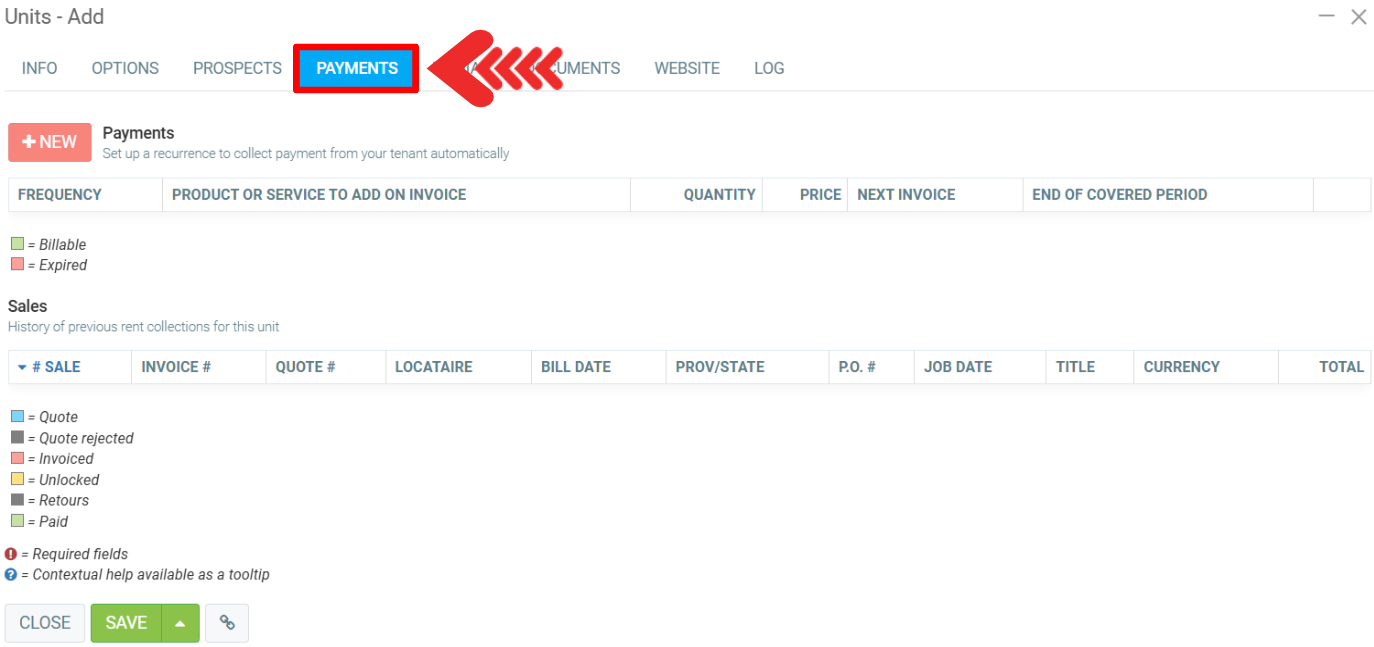
In the Payments tab, you can quickly create a recurrence on the system, so that rent money is automatically withdrawn from the tenant's account or credit card.
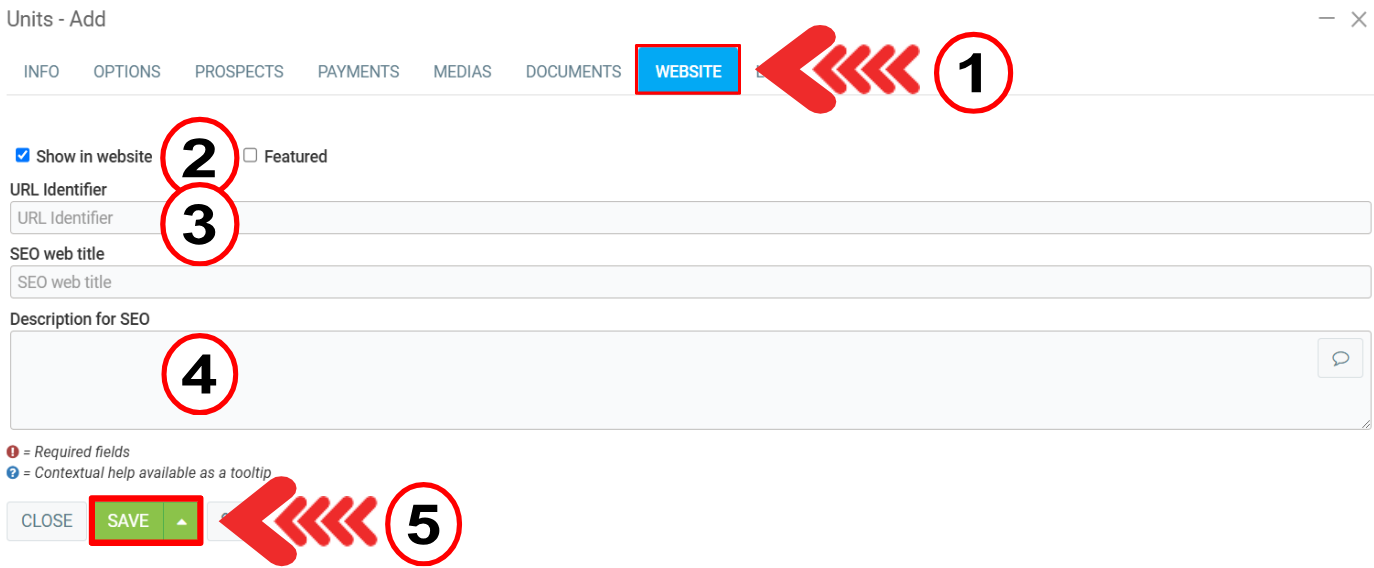
Website
The Website is accessible from the menu of the same name, where you can manage whether or not to display the unit on the web site, as well as various parameters for it.
Several configurations are available to change texts, colors and images on the site.
To have units displayed on your website, be sure to activate them in the units Website tab.
The website works in the same way as the GEM-FNI website, so you can rely on its documentation. With the exception of the filters, which are different, given the unit context.
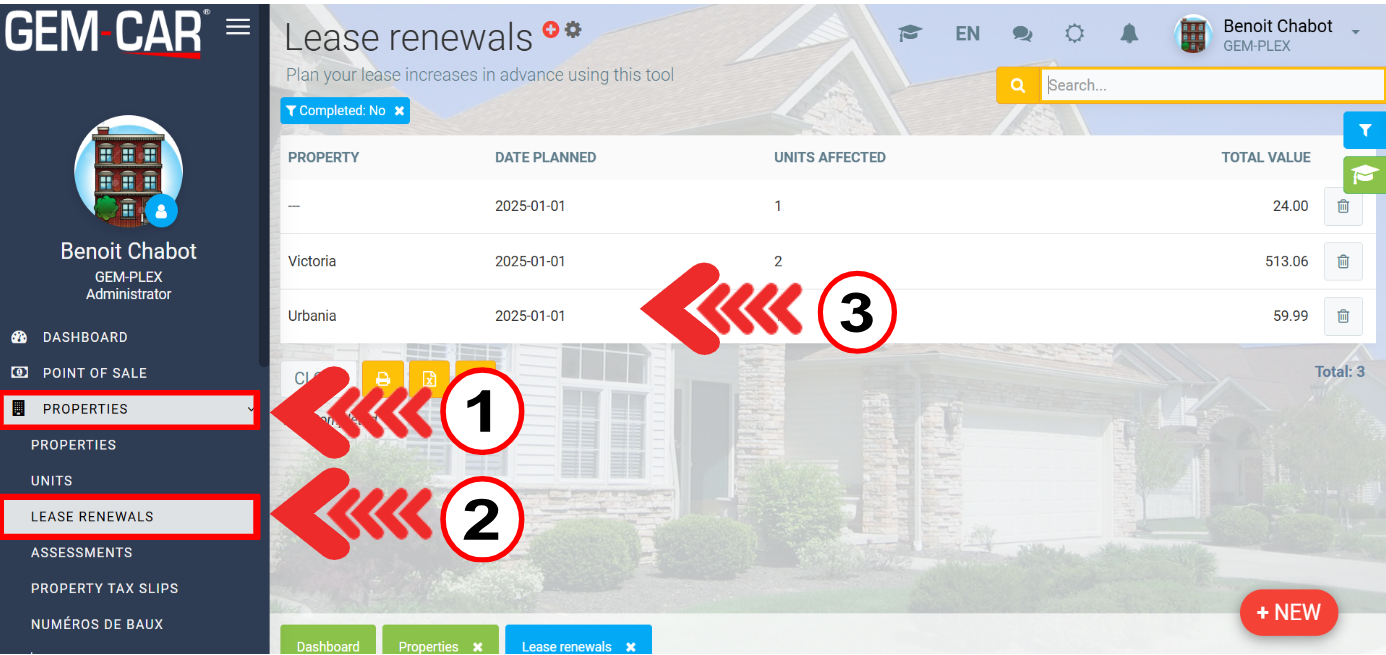
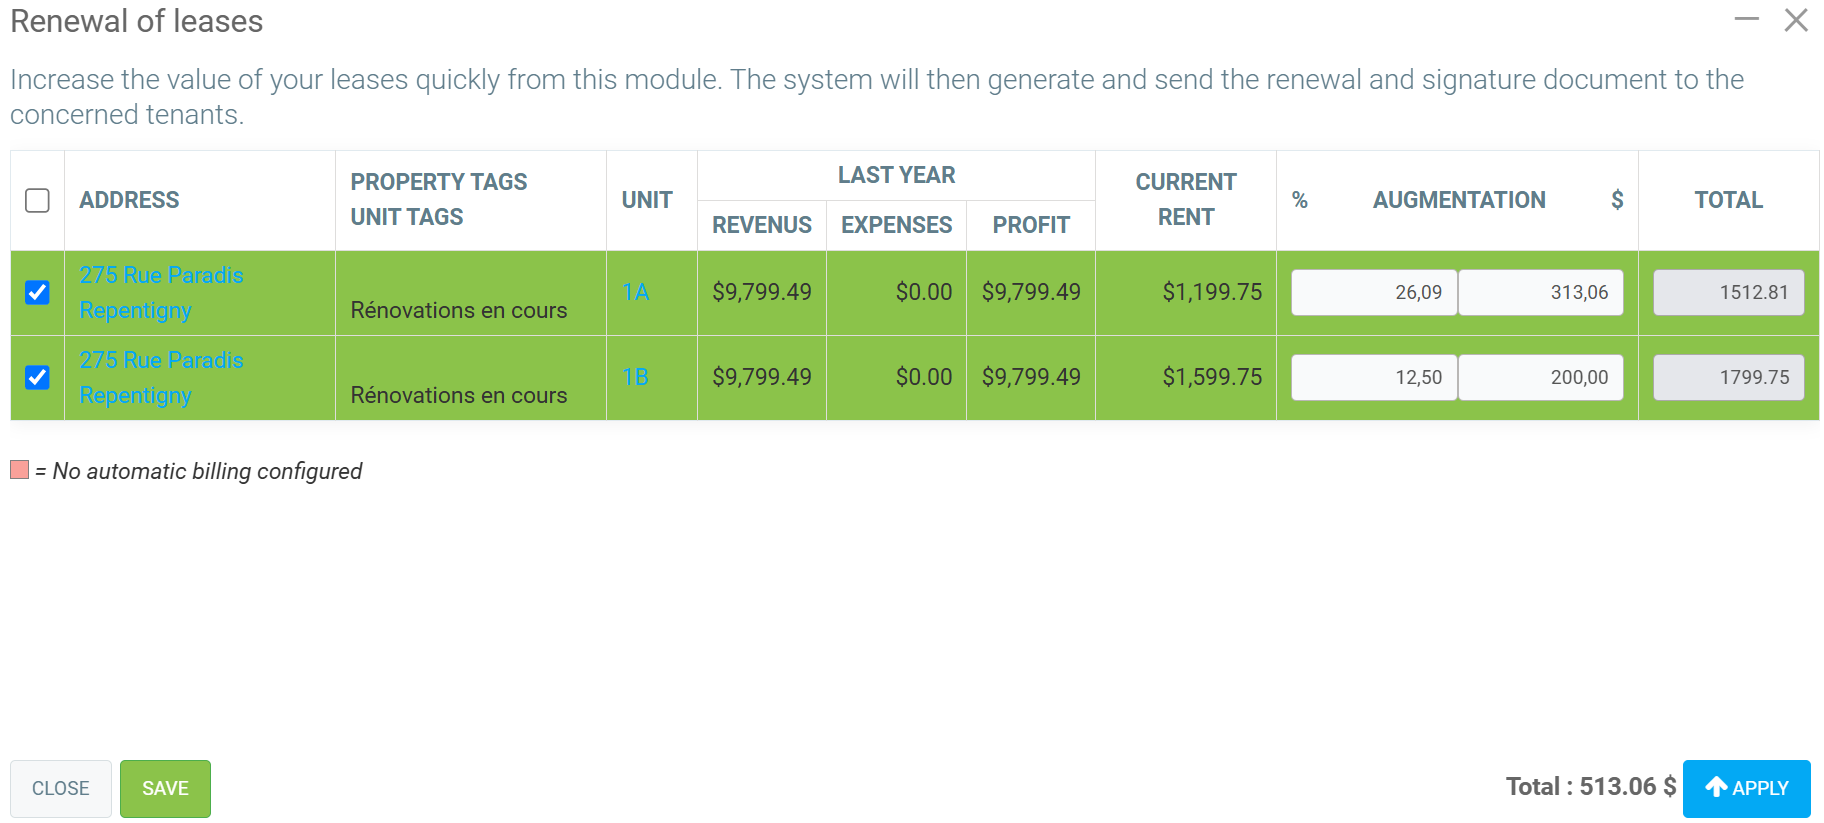
Lease renewal
In the Properties > Lease renewals menu, you can prepare lease renewals and view their history.
By default, only uncompleted renewals are shown in the list, but you can change the filter to view the entire package of past renewals.
You can perform renewals on a specific property, or all at once.
Reports/Widgets
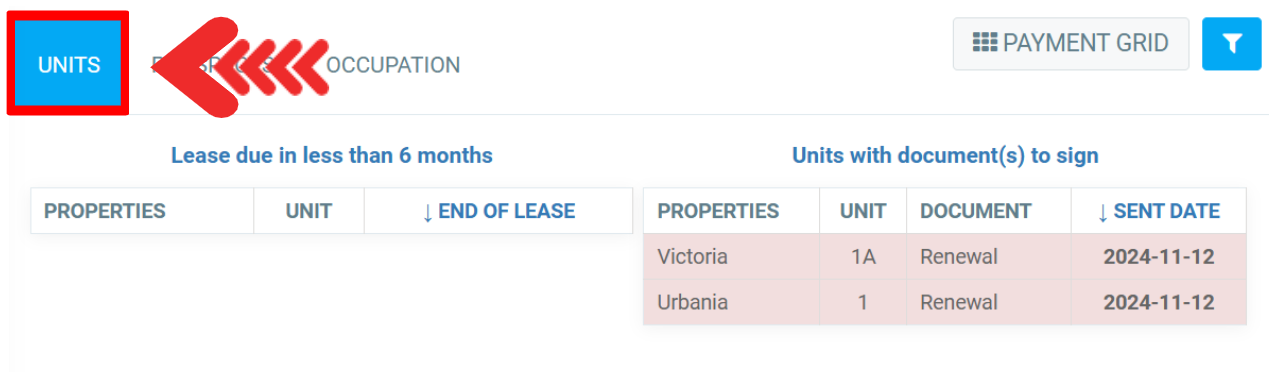
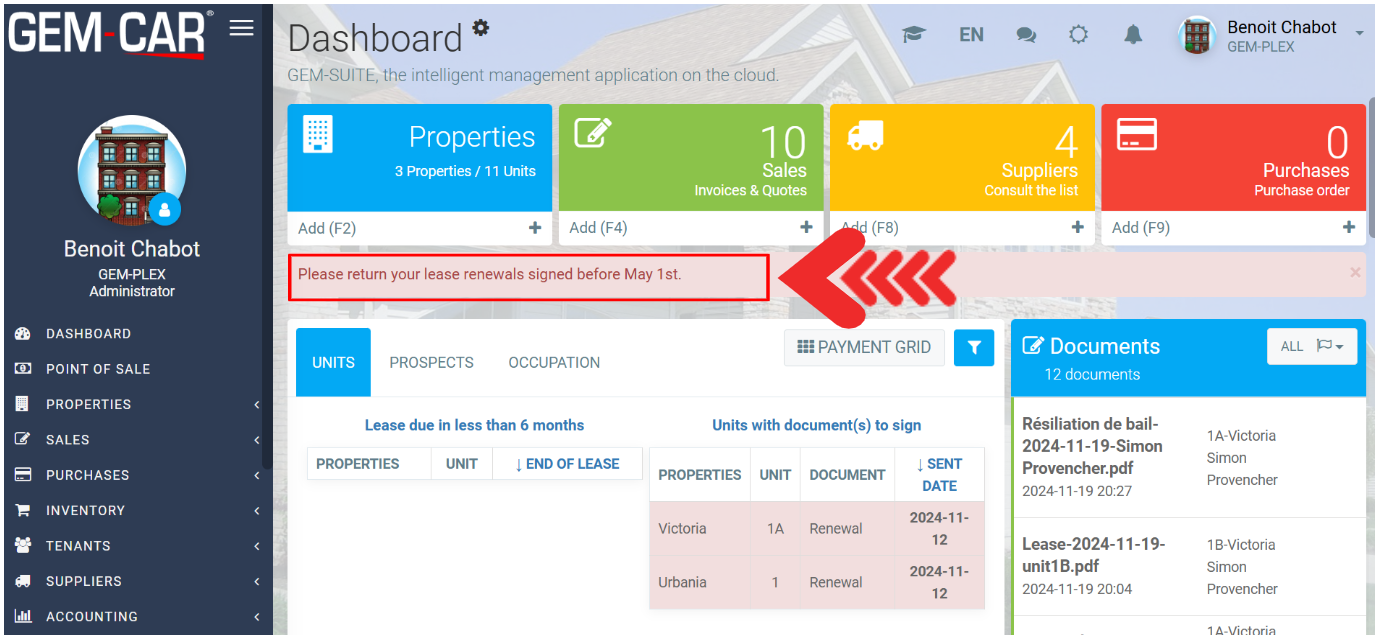
The first and most important new widget is located first on the home page, and features a package overview of units and actions to be taken. This module has three tabs at present, but may have more in future adjustments.
First tab (Units): This tab shows units with leases expiring soon, i.e. up for renewal. On the right, you can also see units with documents awaiting signature.
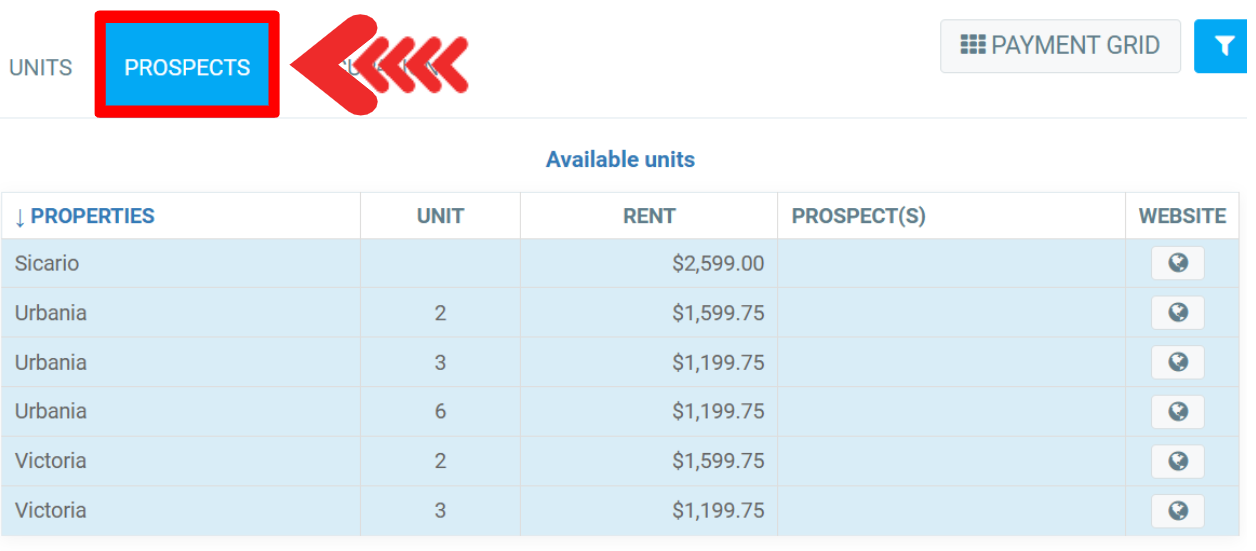
Second tab (Prospects): This tab shows the units that currently have no tenants, with the prospects on their sheet. On the right, a shortcut to the website page is accessible.
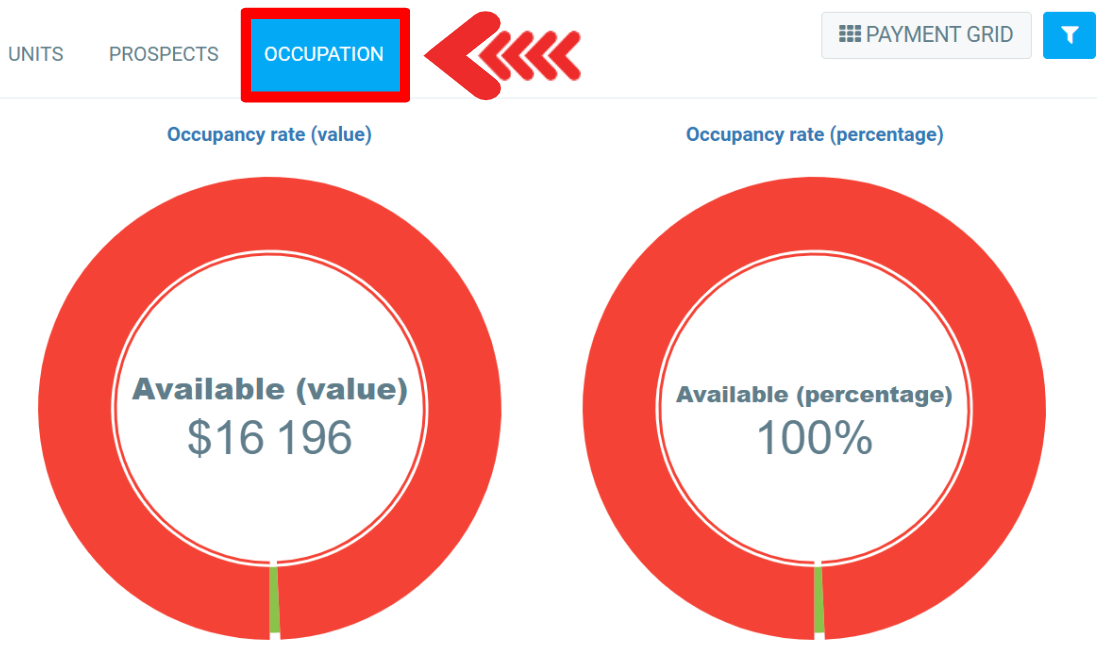
Third tab (Occupancy): This tab shows graphs of the occupancy rate for the package, in both monetary value and percentage.
Two buttons are also accessible at the top to perform commonly used actions.
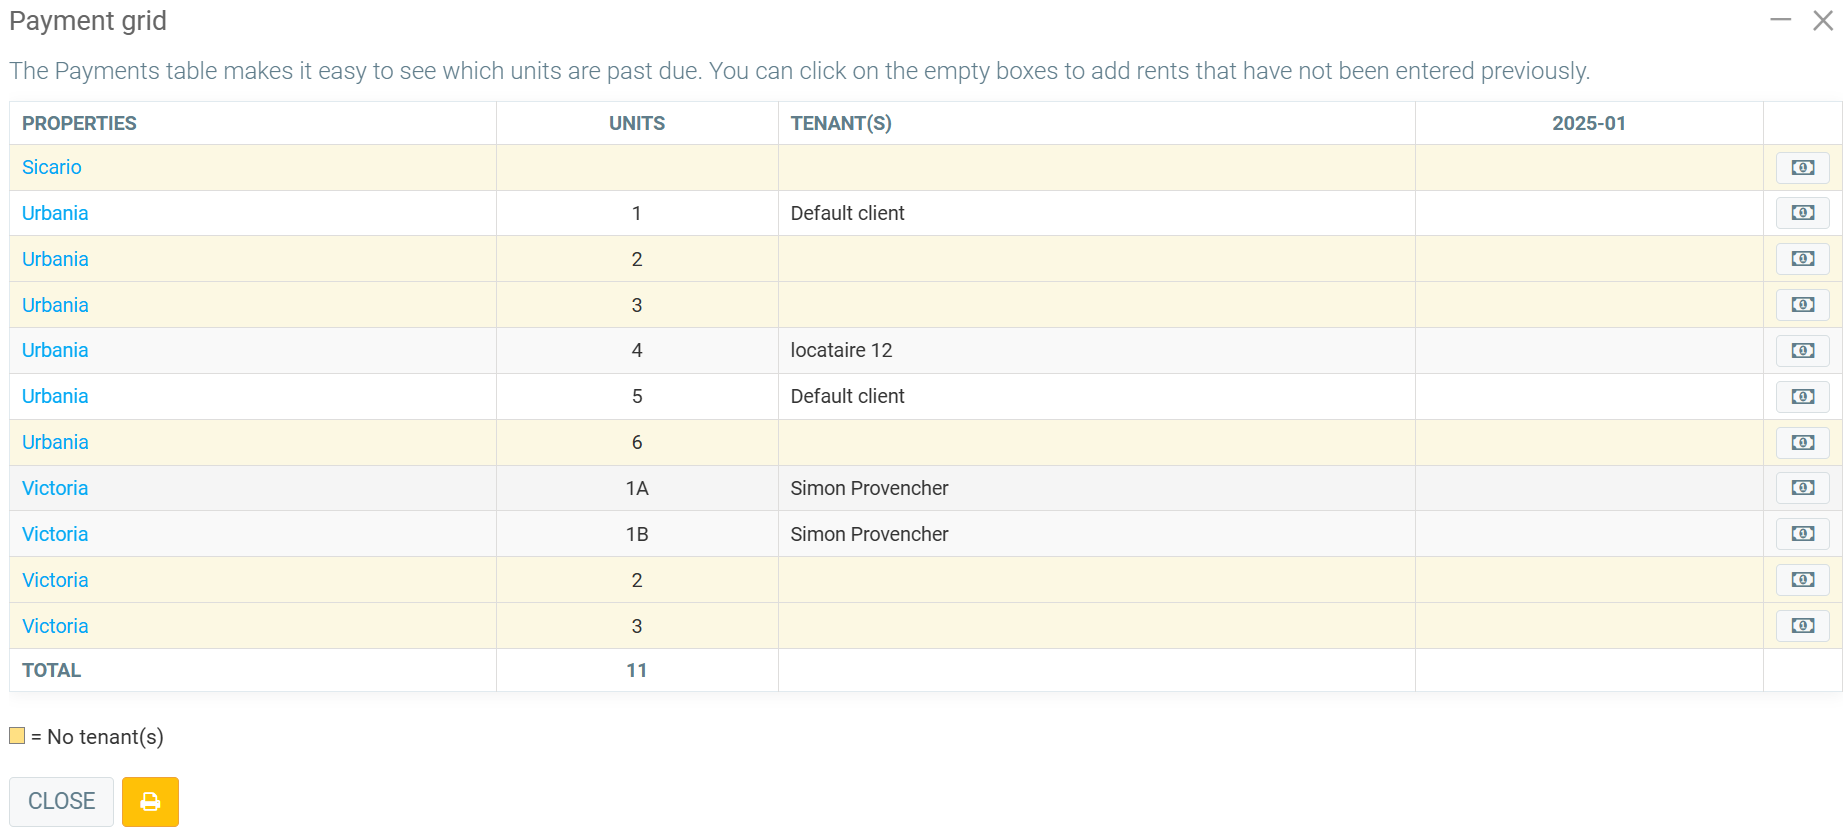
- Payment grid: The payment grid is very useful for getting an overview of the package with the amounts not yet paid, as well as those to come. This interface also allows you to add rents from previous months if you have forgotten to do so.
- Profitability report: The profitability report is also accessible from the menu, and shows the income and expenses associated with each unit.
Client portal
When a customer is invited to the platform, he has access to consult and sign his documents.
They can also submit a project request from the platform, which will be sent to the system administrator.
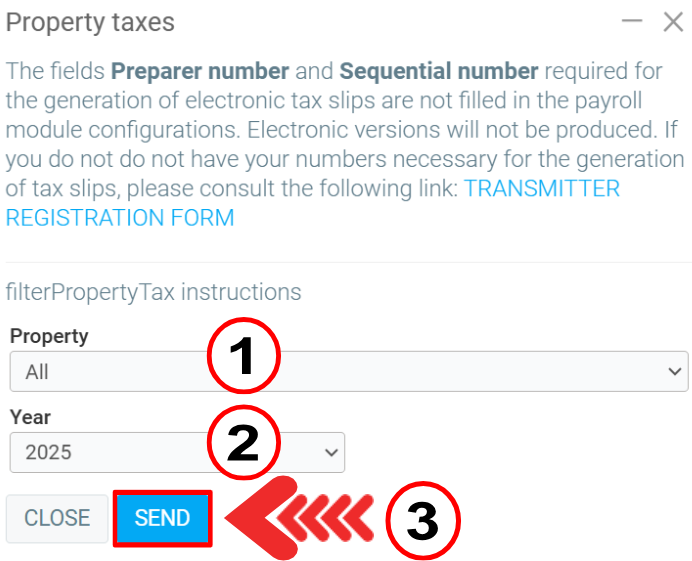
Tax slips
The menu Properties > Tax slips > +New allows the administrator to generate the documents required for year-end, including the Statement T776.
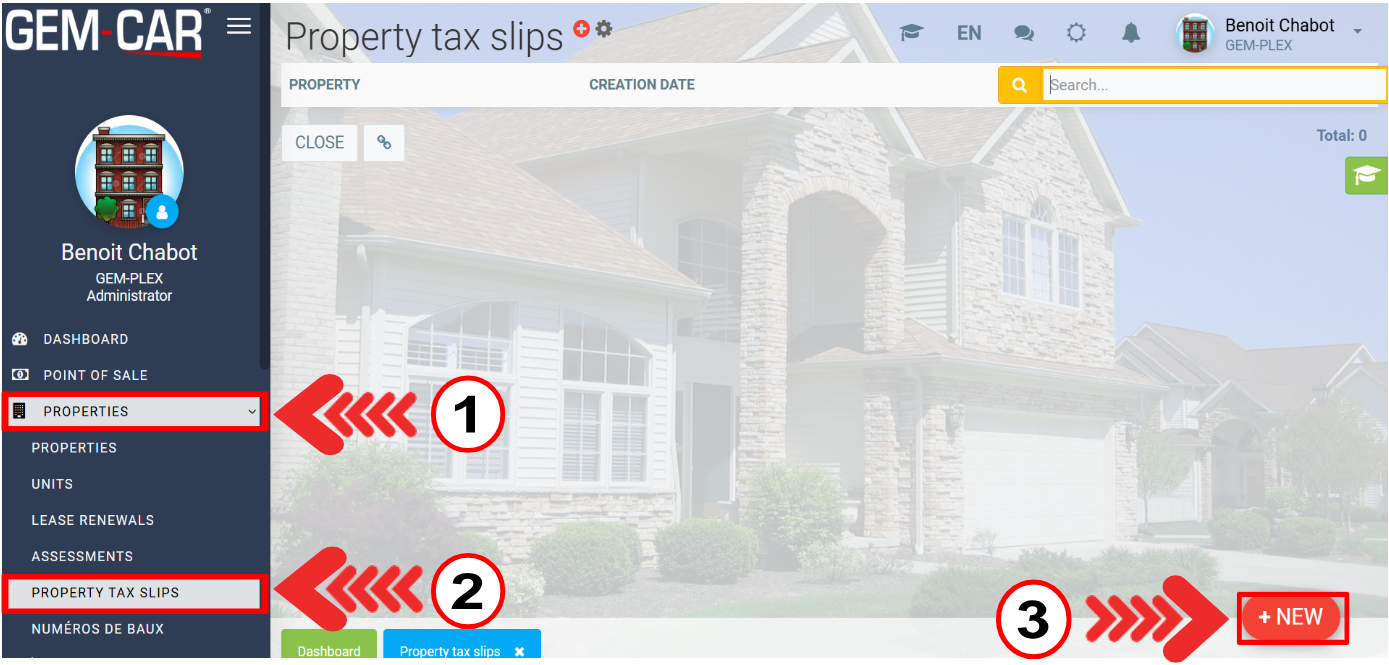
Similar to the payroll tax slip system, the list offers the previously generated history, and a new ZIP can be generated for the property package.
Other tools
All GEM-BOOKS functions are available for GEM-PLEX, but here are some features that have been adapted for the new module.
Communications > Notification Center: Internal communications can now be targeted to tenants in a specific unit.
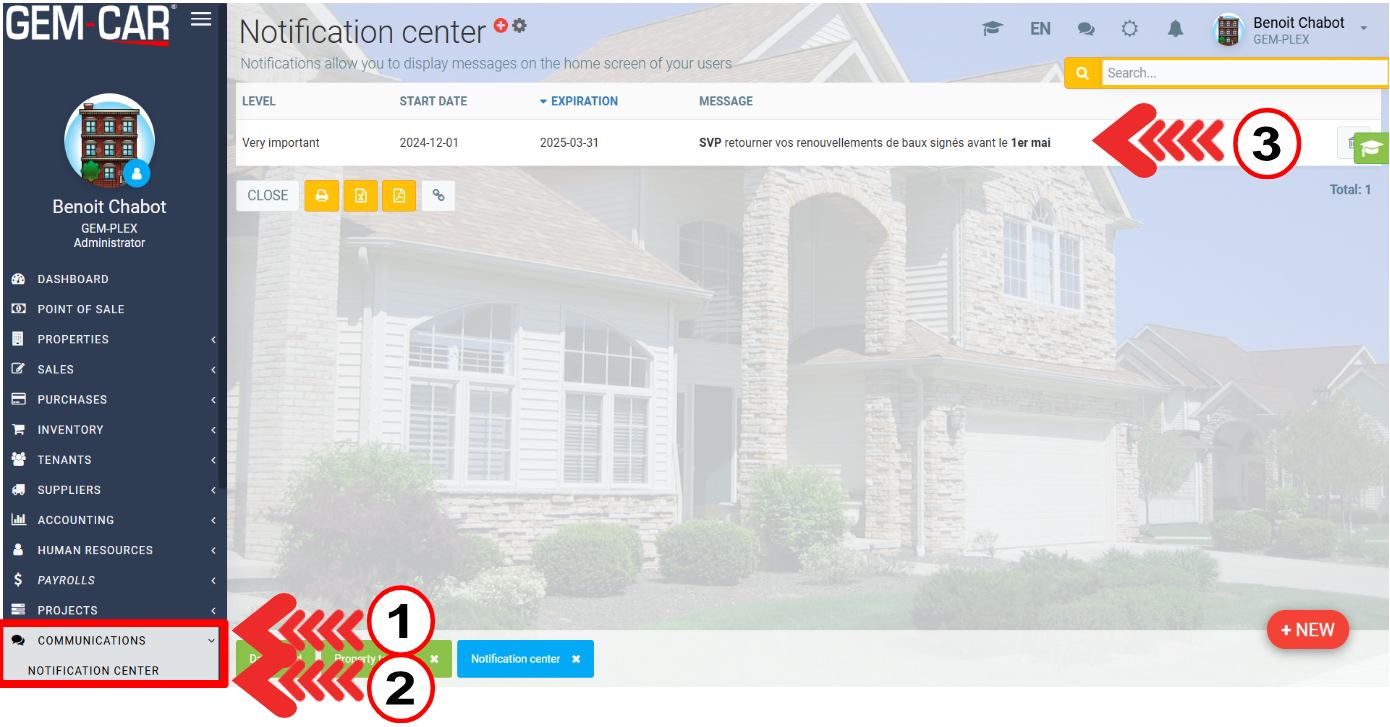
In the Notification Center > Info tab, you will find the following information:
- Level
- Start date
- Expiration
- Message
Click on Save and Close.

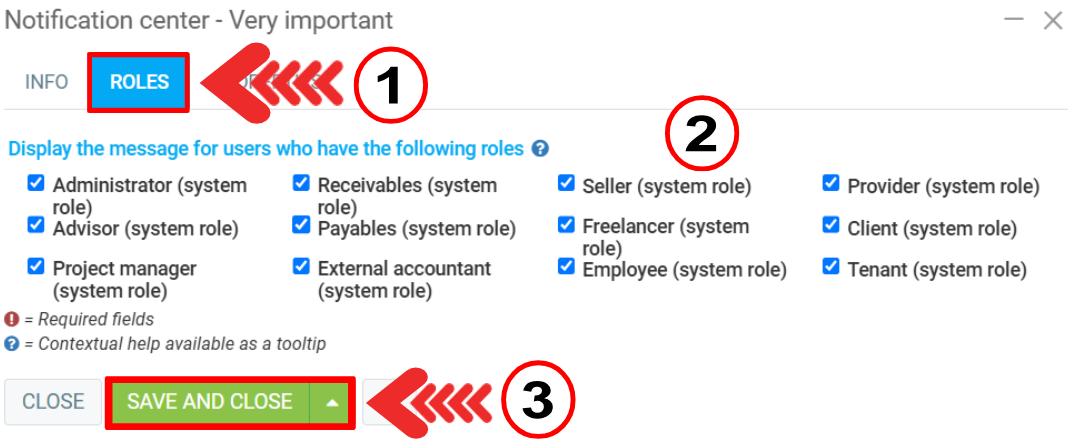
In the Notification Center > Roles tab, you have the following information: “Display the message for users who have the following roles”.
Check the boxes you wish and click on Save and Close.
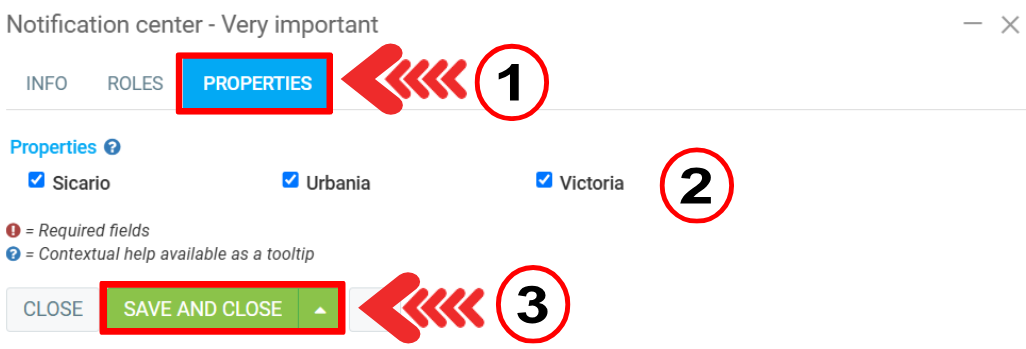
In the Notification Center > Properties tab you'll find the checkboxes for the properties listed.
Check or uncheck the boxes and click Save and Close.
The important message appears on the Dashboard.
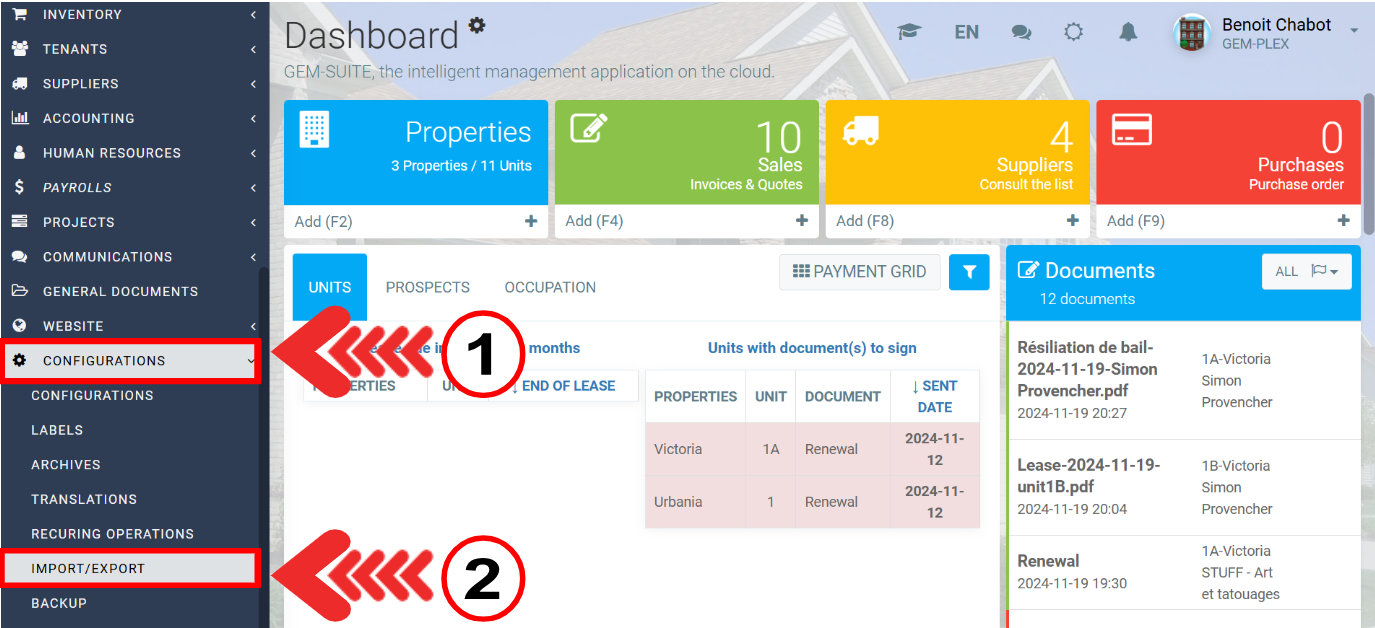
Data import: A section for importing/exporting property data has been added.
Click on Configurations > Import/Export.
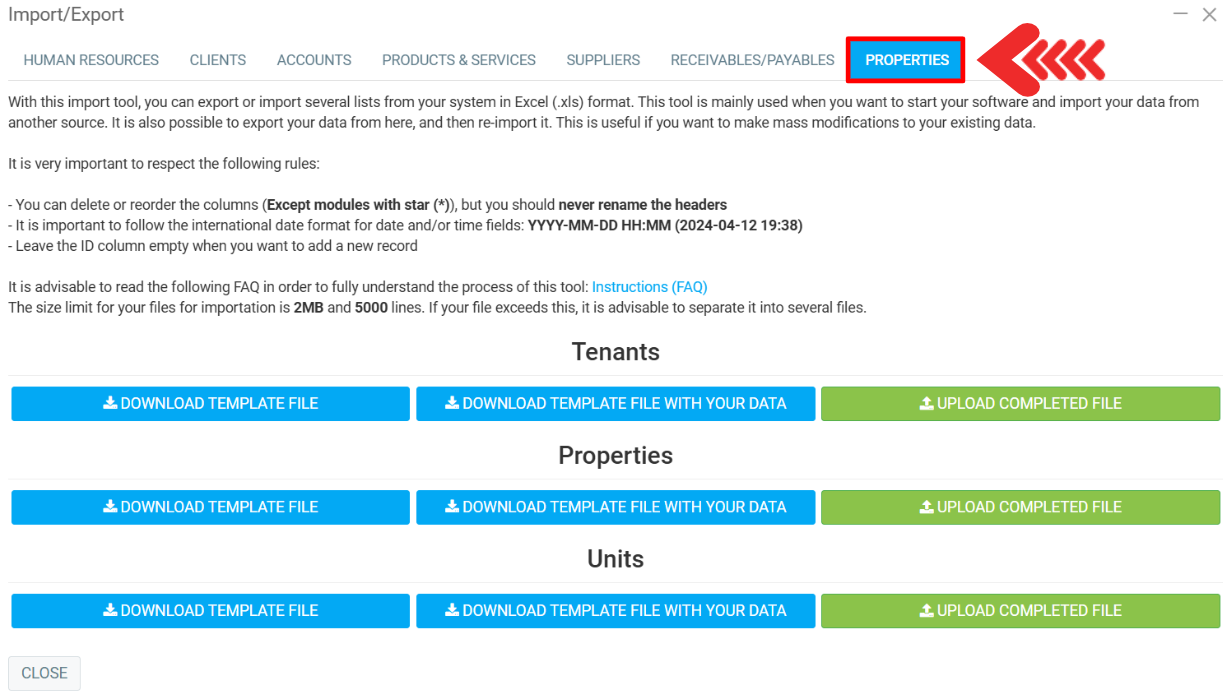
Then click on the Properties tab. In this tab, you can Upload the template file, Upload the template file with your data or Upload completed file with the following options:
- Tenants
- Properties
- Units
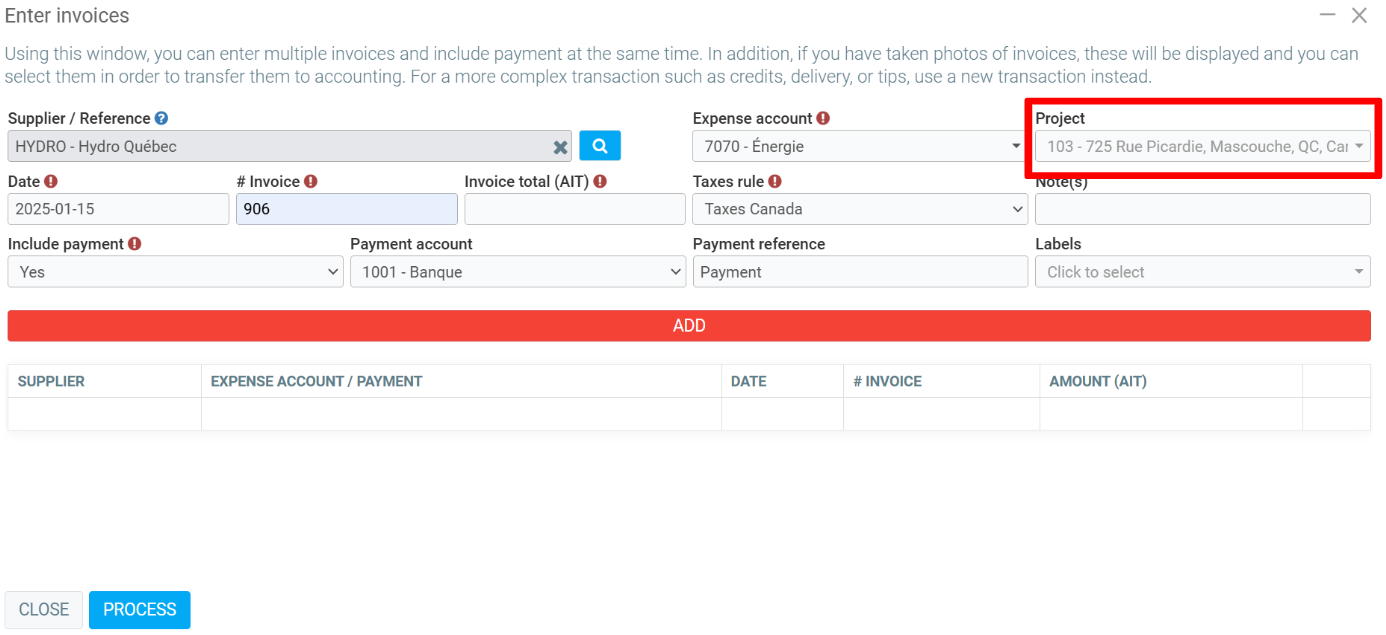
Invoice registration with projects: In the invoice registration interface, you can now link a project directly to the expense (available to all, not just GEM-PLEX).
Click on Suppliers > Register invoices.
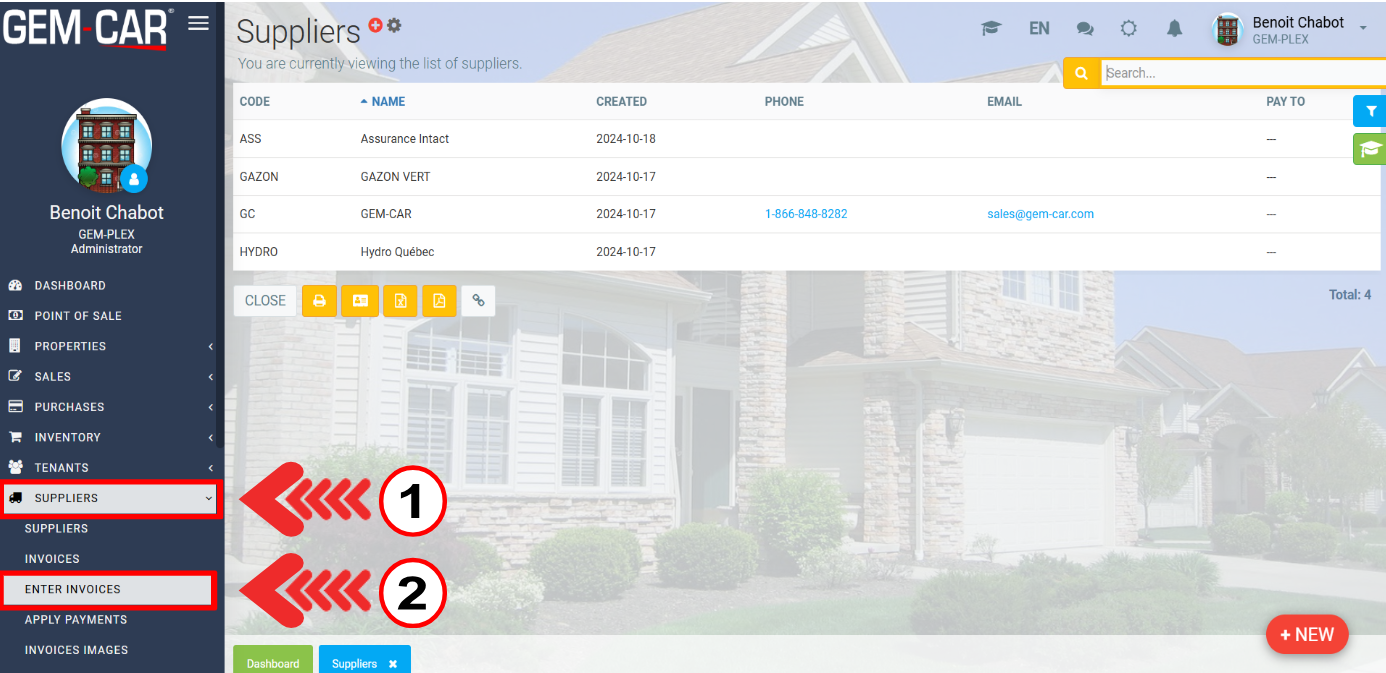
On the next page, enter the following information:
- Supplier/Reference
- Date
- #Invoice
- Invoice total (AIT)
- Include payment
- Payment account
- Expense account
- Taxes rule
- Payment reference
- Project
- Note(s)
- Labels
Then click on Process.
Posted
1 month
ago
by
Bianca da Silveira De Amorim
#2307
50 views
Edited
1 month
ago