GEM-CAR FAQ
How to Configure and Use Autoserve1
By using GEM-CAR you can have access to various tools that make it easier to carry out services. One of them is Autoserve1.
What is AutoServe1?
The AutoServe1 service includes digital inspection sheets and permits you to take photos and to chat live directly on your smartphone. It makes your inspection tasks easier and increases the sales of your services.
You can contact Autoserve1 to learn more about the features and pricing or if you forgot your username and password.
- Website: https://autoserve1.com/
- Telephone: 1-800-268-3437
- E-mail:
This email address is being protected from spambots. You need JavaScript enabled to view it.
GEM-CAR can also be completed by the GEM-CHECK module, our digital inspection form service for a monthly membership fee of $50.
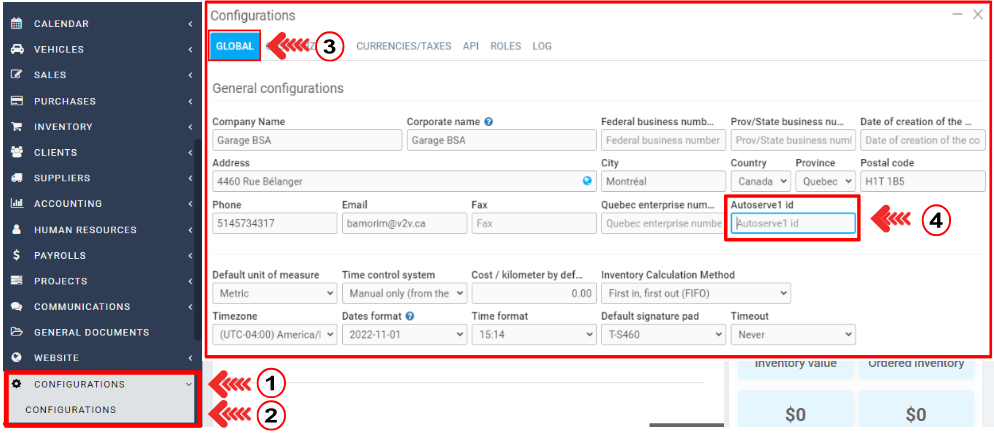
To configure Autoserv1 in your GEM-CAR system, a few settings are required.
First, click on the menu on the left under Configurations > Configurations and enter your Autoserve1 id.
Then scroll to the bottom and click Save.
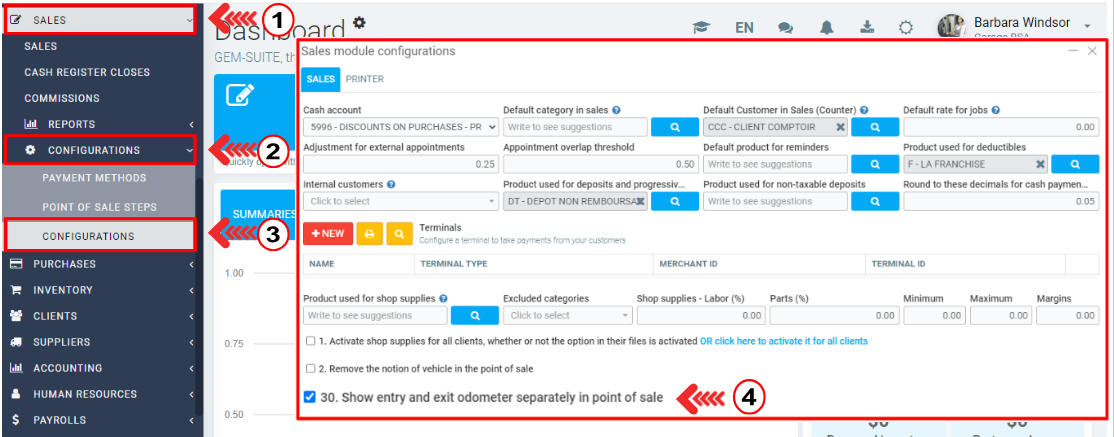
In the Sales tab, click on Configurations > Configurations and check if the option ''Show entry and exit odometer separately in point of sale'' is checked. If not, check it. Scroll down and click on Save.
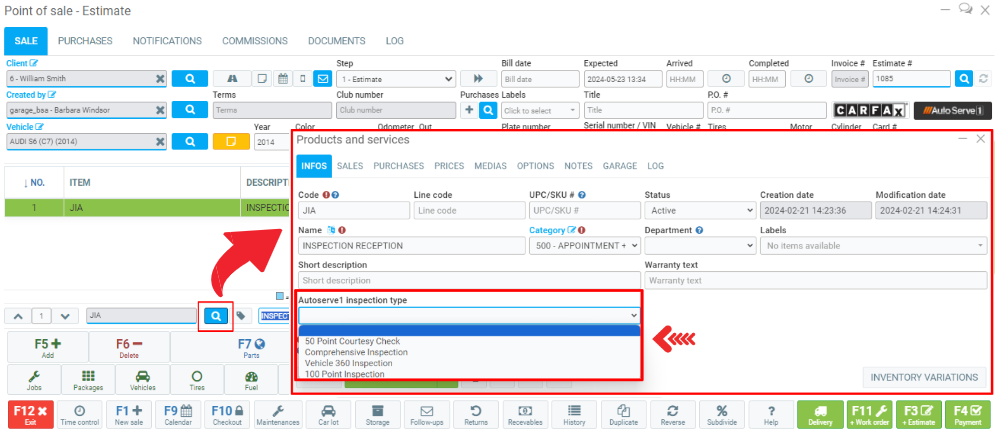
Open the Point of sale, select the customer who wants the vehicle inspection.
Select the inspection job and open the magnifying glass next to the service description.
In the next window, choose the type of inspection from the options under ''Autoserve1 inspection type''.
Then click on Save and close.
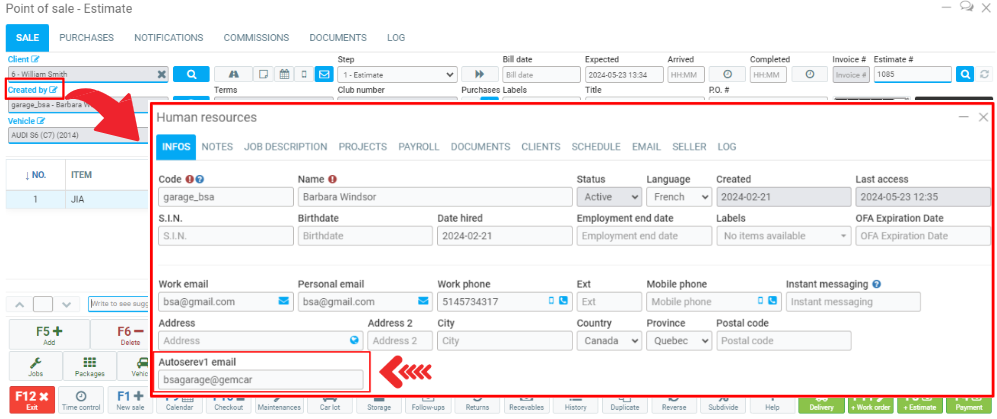
Without closing the Point of sale, under client, click to edit the user's file ''Created by''.
Then, add your Autoserve1 email. Click on Save.
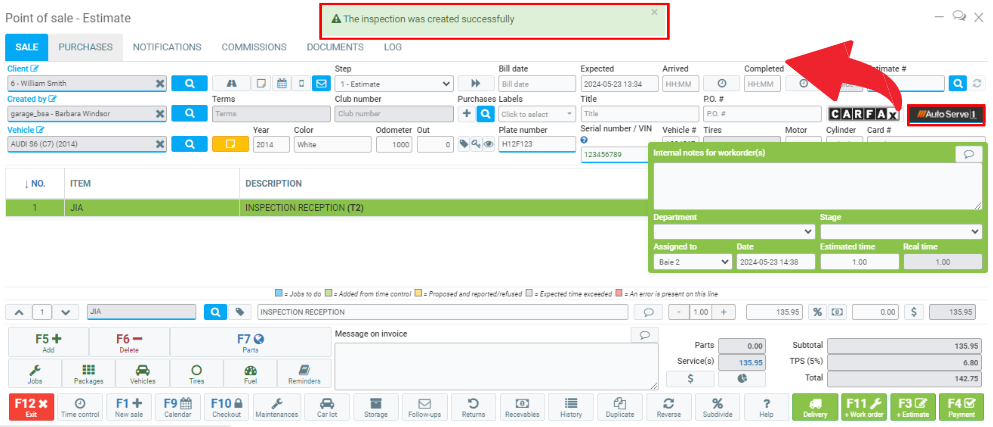
Click on the Autoserve1 button in the top right corner of the Point of sale.
A green window with the following message should appear: ''The inspection was created successfully''.
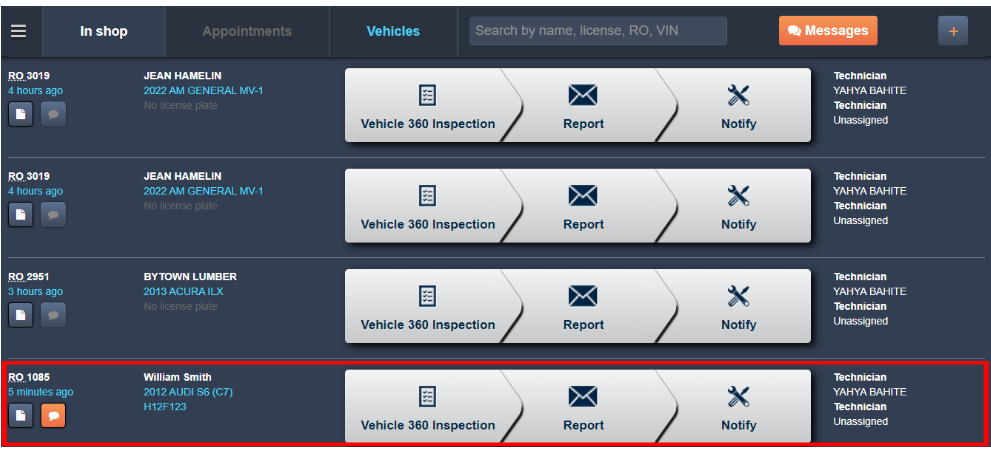
Go to the Autoserve1 page. Enter your login and password.
The inspection we have just scheduled is on the main page.
Posted
1 year
ago
by
Olivier Brunel
#286
279 views
Edited
9 months
ago