GEM-CAR FAQ
How to Use the Option to Draw on Photos Imported on Inspections
To use the drawing option on photos imported during inspections, start by opening the inspection report and selecting the desired photo.
Use the provided tools to highlight areas, add notes, or mark specific points directly on the image.
Once finished, save your changes to ensure the annotated photo is included in your report.
Click on Vehicles > Inspections > +New to create a new inspection.
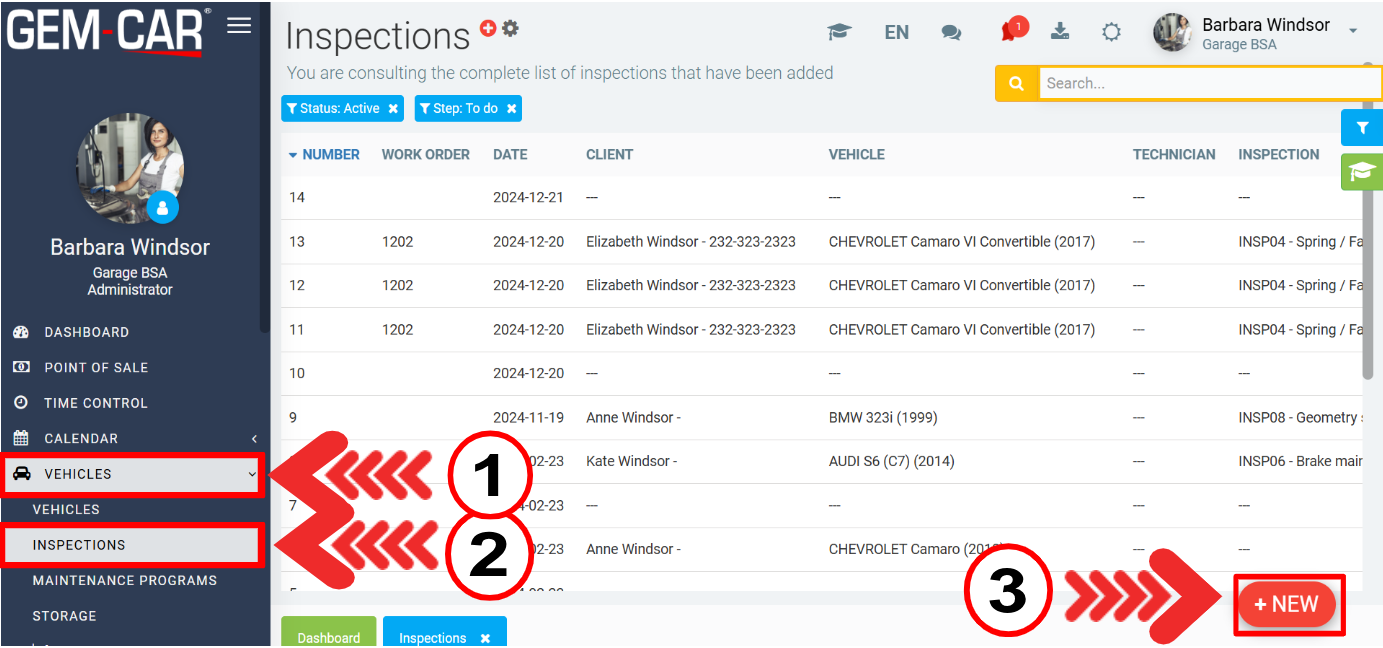
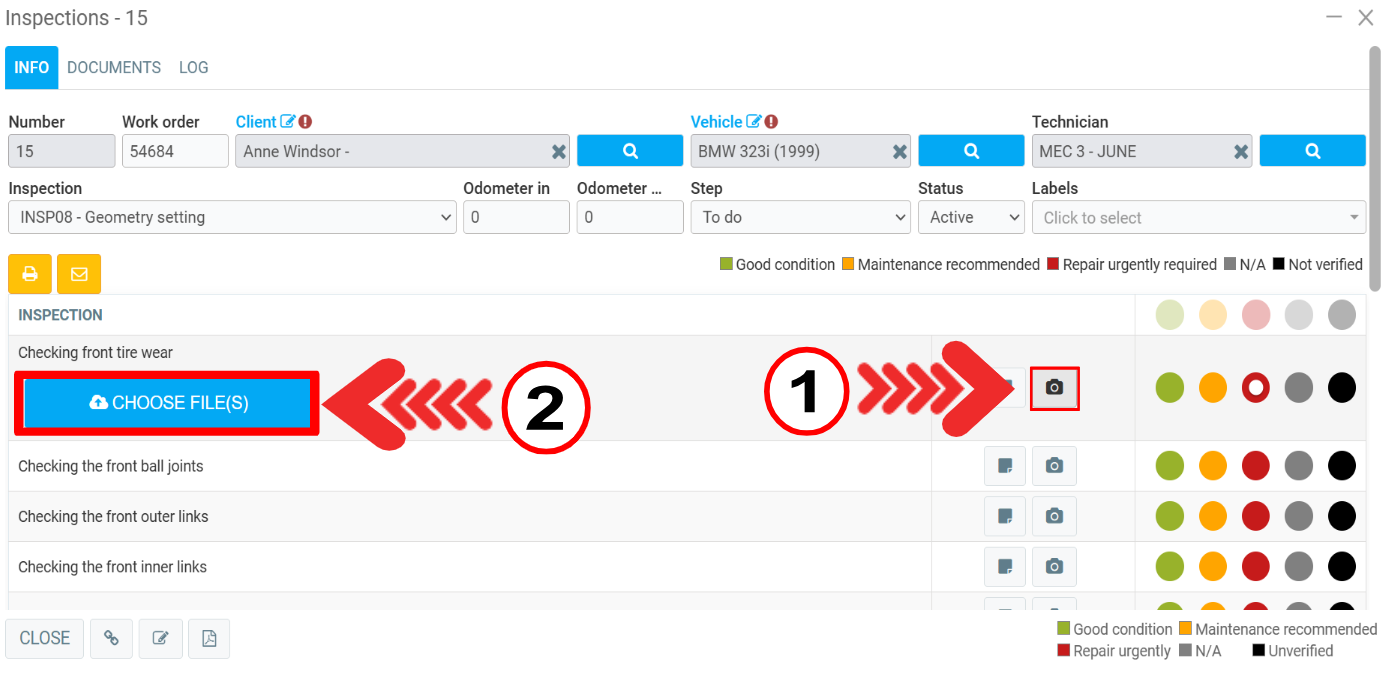
In the next window, in the Info tab, enter all the information you need to create a new inspection:
- Work order
- Client
- Technician
- Inspection
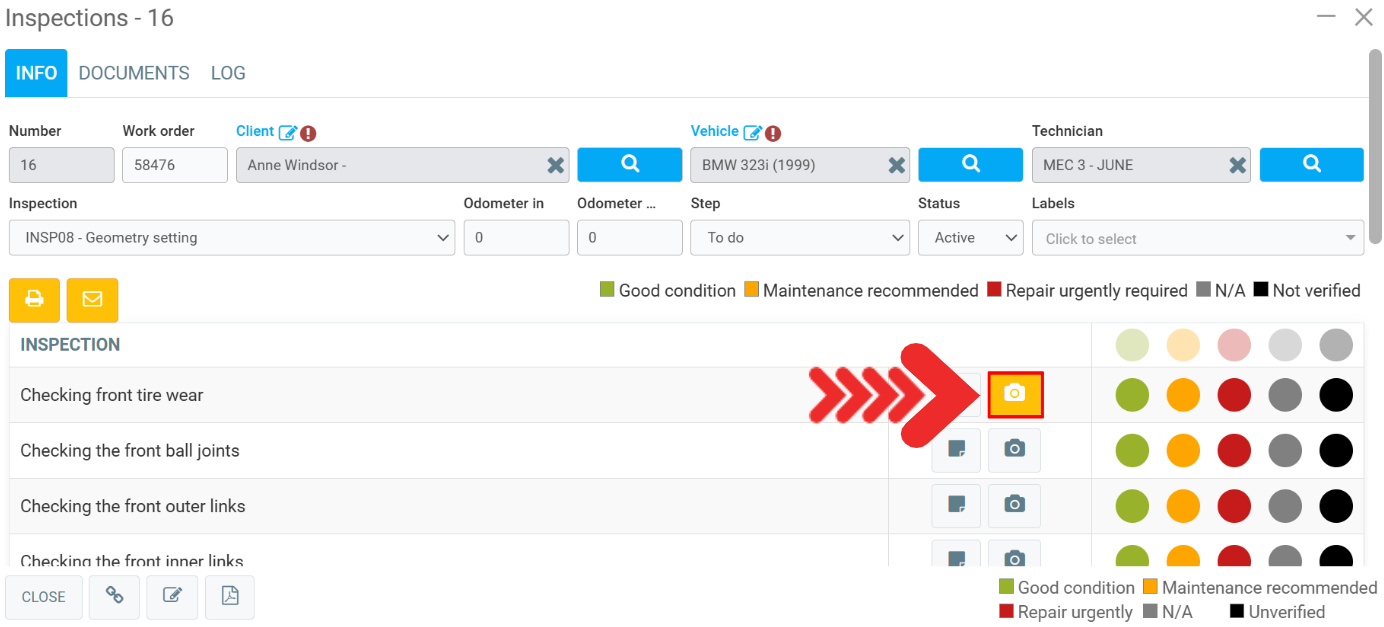
To insert a photo, which will help prove some information relevant to the inspection, click on the photo icon. Then click on Choose file(s).
Once you've chosen the right photo file, a bar with various editing options appears below the selected image.
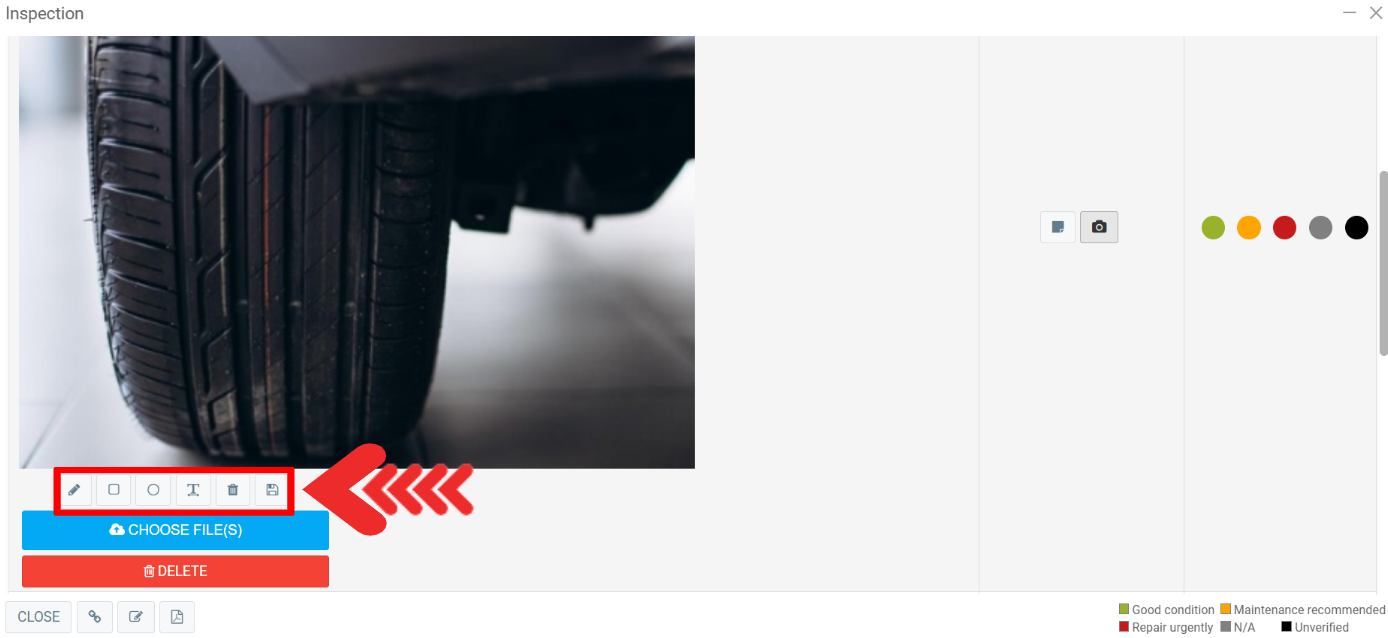
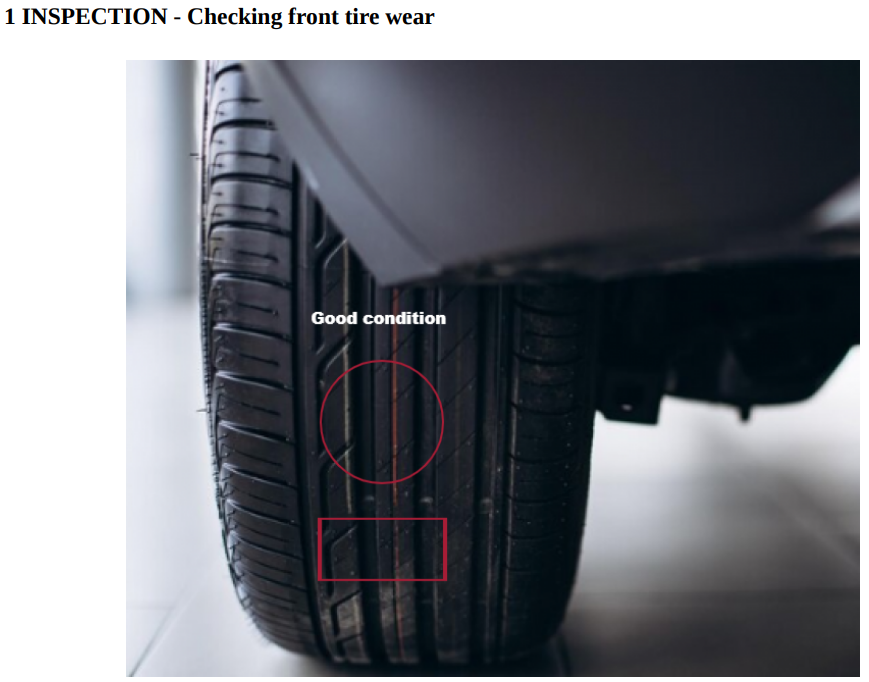
You can use the pencil to write, the circle and square to highlight a specific space, and the text to leave a message.
You can delete changes by pressing the trash button, or save all changes by clicking on the floppy disk. The following message appears in green: “Your changes have been saved”.
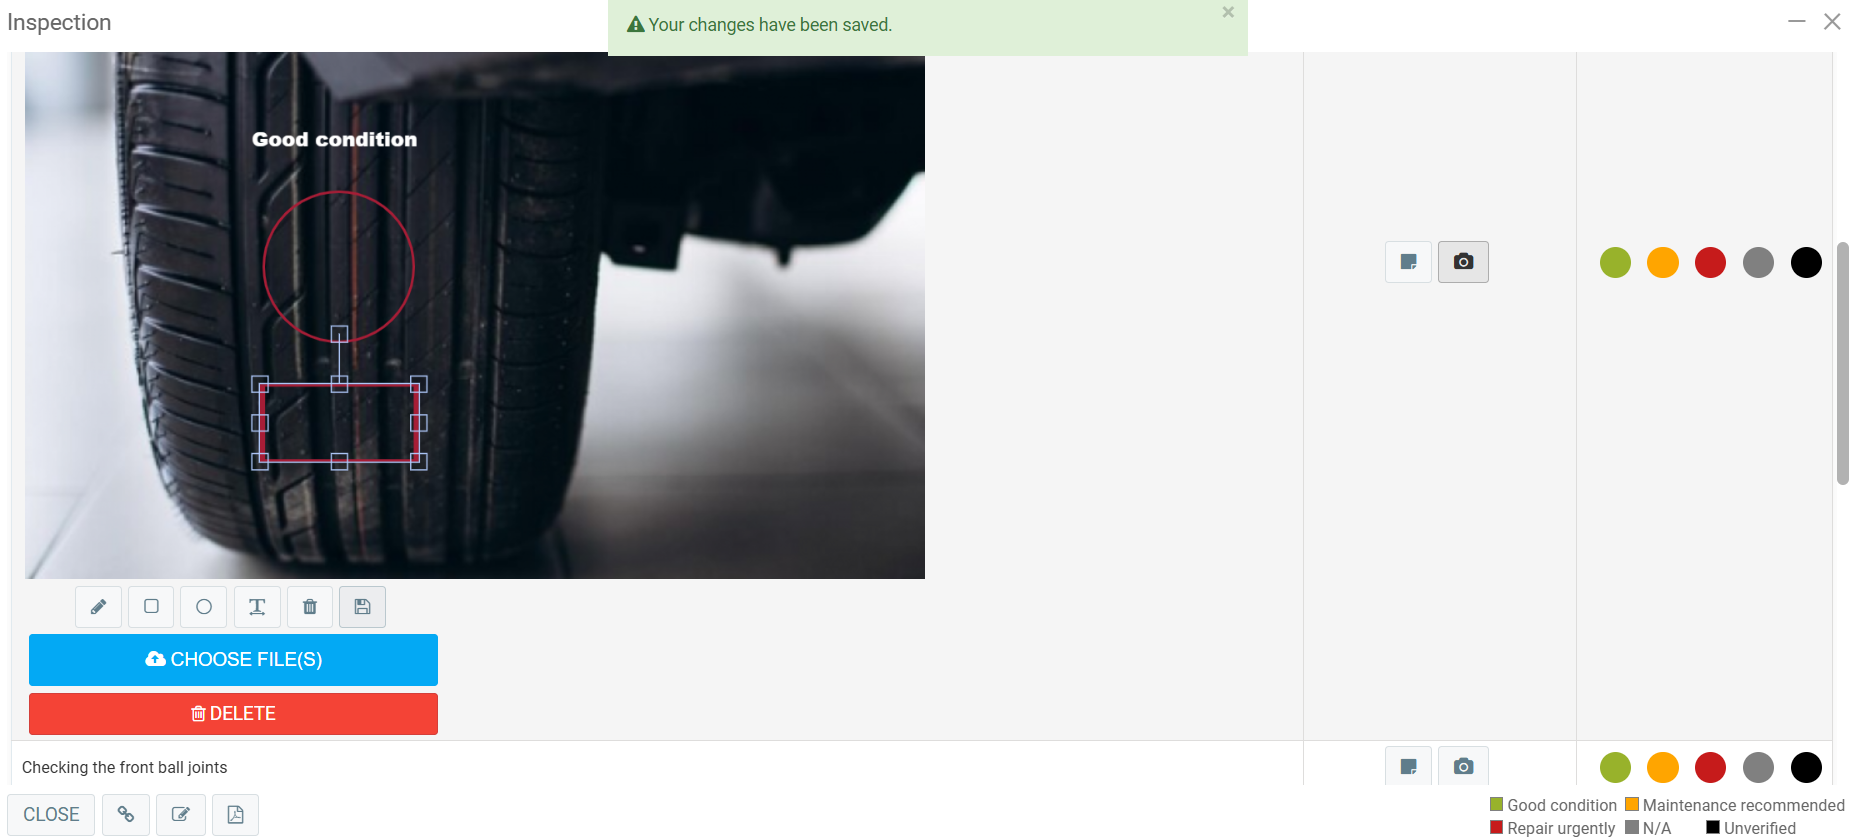
To find out which points of the inspection contain photos, simply observe that the camera changes color, turning yellow when there's a photo file there.
When generating the report in PDF format, the photo will appear at the end of the document, along with any changes made to the photo.
Other articles on the subject:
Starting/ Opening a Digital Inspection
Completing the Digital Inspection Form and Checklist
Print or Send an Inspection Report Through Email or SMS
Configurations Required to Use the Digital Inspections Module
Activating of the Digital Inspections Add-on
Posted
3 months
ago
by
Bianca da Silveira De Amorim
#2285
53 views
Edited
2 months
ago
